Showing posts with label Roofing. Show all posts

Sunday, December 21, 2025

When to Replace Your Roof

Replacing a roof represents one of the most significant home maintenance investments many homeowners will face, typically costing $10,000 to $30,000 or more. The decision of when to replace your roof can significantly impact both your family’s safety and your long-term financial well-being. Understanding the warning signs, timing considerations, and assessment process helps you make an informed decision that protects your home and maximizes your investment.
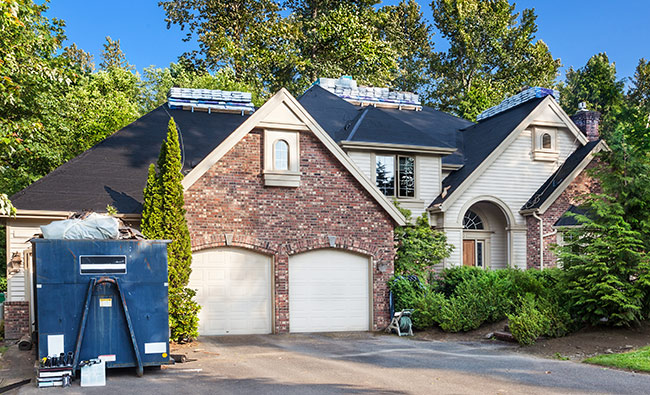
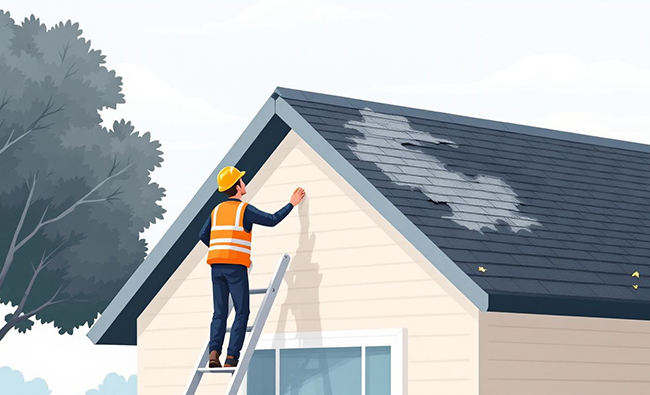
when to replace roof warning signs

This comprehensive guide covers everything you need to know about roof replacement timing, from recognizing critical warning signs to planning your budget and selecting the right roofing contractor for your project.

When You Should Replace Your Roof

The timing for roof replacement depends heavily on your roofing material and several key factors that affect the roof’s life expectancy. Different materials have dramatically different lifespans, and knowing your roof’s expected lifespan helps you plan for replacement before emergencies arise.

Material-Specific Replacement Timelines:

  • Asphalt shingle roof systems should be replaced after 15-25 years of service, though many begin showing significant wear around the 15 year mark
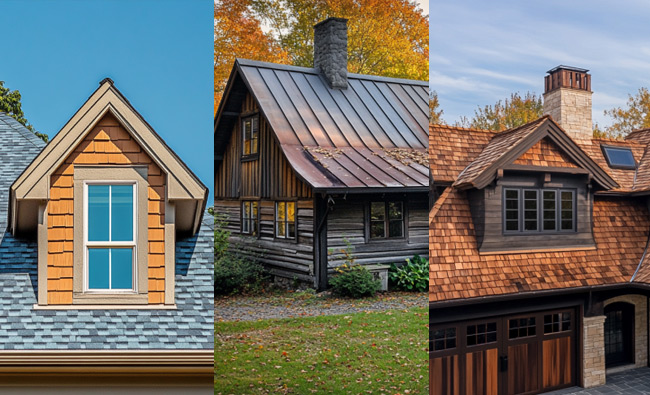
  • Metal roof installations typically need replacement after 30-70 years, depending on the coating quality and environmental conditions.
  • Clay tile and slate roofs can last 50-100 years before requiring complete replacement, though underlayment may need attention sooner.
  • Wood shakes and shingles generally require replacement every 20-40 years, with higher replacement frequency in moisture-prone or wildfire-risk areas.

Immediate Replacement Triggers:

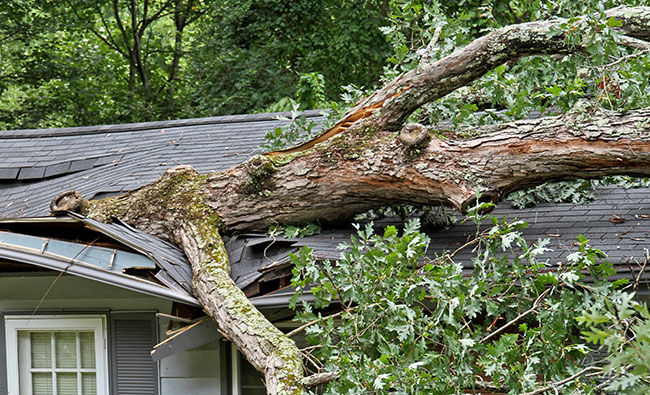
Regardless of age, certain conditions demand immediate action. Replace your roof immediately if you have persistent leaks that persist despite repairs, major storm damage that affects structural integrity, or widespread shingle failure affecting more than 30% of the roof surface.

Consider replacement when repair costs exceed 30% of the cost of a new roof. At this point, investing in a complete roof replacement often provides better long-term value than continued piecemeal repairs that may fail again within a few years.

Age-Related Replacement Guidelines

Tracking your roof’s age provides crucial information for replacement planning. Many homeowners don’t know when their roof was installed, which makes timing decisions more difficult and can lead to emergency replacements that cost significantly more than planned projects.

Age Tracking and Planning:

Track your roof’s installation date to plan for timely replacement. If you don’t know when your roof was installed, check home inspection reports, previous owner records, or have a roofing professional estimate the age based on material condition and installation techniques.

Roofs older than 15 years should undergo annual professional inspections to monitor condition and identify emerging issues. This proactive approach helps you plan replacement timing and budget accordingly, rather than facing surprise emergency costs.

Proactive Replacement Planning:

Consider replacing your roof if it is within 5 years of its expected lifespan, especially if you notice any warning signs of deterioration. This timing allows you to schedule work during optimal seasons and compare multiple roofing contractor estimates without time pressure.

Poor installation or ventilation can reduce lifespan by 5-10 years. If your roof shows signs of premature aging, such as excessive granule loss or shingles curling before typical age thresholds, investigate whether ventilation improvements or installation issues contributed to accelerated wear.

Regional Considerations:

Neighborhoods built in the 1990s-2000s are entering prime replacement years for their original asphalt shingle systems. Many of these communities used similar materials and installation techniques so that multiple homes may need roof replacements around the same time. This creates both opportunities for neighborhood contractor discounts and potential scheduling challenges during peak demand periods.

Critical Warning Signs Requiring Immediate Replacement

Recognizing roof failure warning signs helps you distinguish between minor maintenance needs and situations requiring complete replacement. These indicators often occur in combination, and the severity and extent of damage determine whether repair or replacement is the better option.
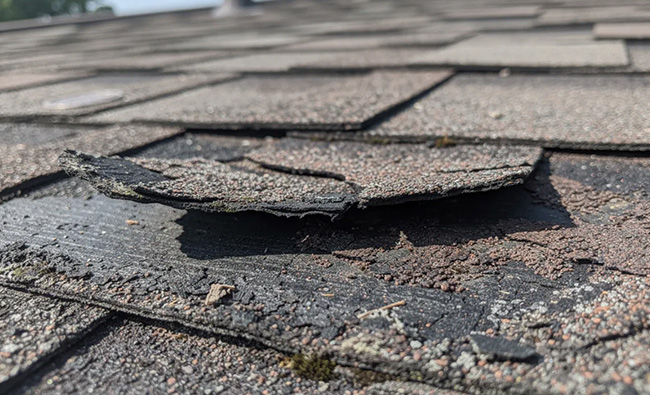
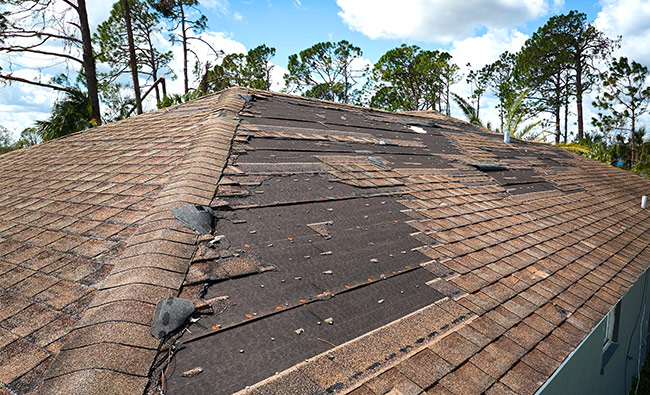
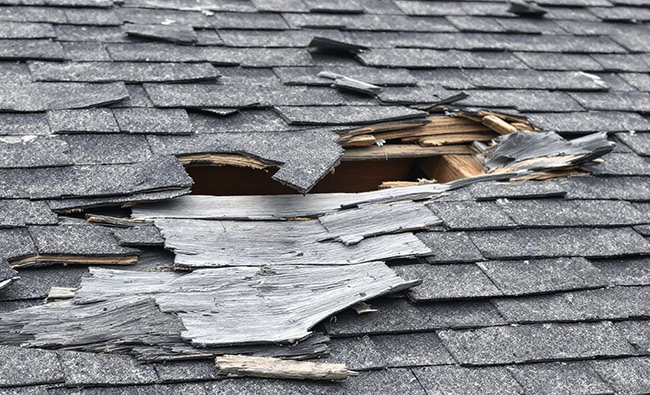
roof damage warning signs, missing and cracked asphalt shingles on a residential roof

Exterior Damage Indicators

Shingle Deterioration Patterns:

Curling, cracking, or missing shingles covering more than 30% of your roof surface indicates systemic failure and requires replacement rather than spot repairs. Curled shingle edges allow water infiltration and accelerate damage to the underlayment and roof deck.

Cracked shingles often result from age-related brittleness and UV exposure. While individual cracked shingles can be replaced, widespread cracking across large roof sections signals that the entire roof system has reached the end of its functional life.

Granule Loss Assessment:

Extensive granule loss visible in gutters after storms or routine maintenance indicates advanced shingle deterioration. Granules protect the underlying asphalt from UV damage and impact, so their loss accelerates further deterioration and reduces weather resistance.

Check your gutters and downspouts regularly for accumulations of granular material that resembles coarse sand. Heavy granule deposits, especially in newer sections of the roof, may indicate manufacturing defects or installation issues requiring professional assessment.

Structural and Surface Issues:

Sagging rooflines or visible structural deformation pose urgent safety hazards that require immediate professional evaluation. Sagging often indicates moisture damage to the roof deck, undersized structural supports, or settlement affecting the building’s framework.

Moss coverage on more than half the roof surface, particularly thick moss growth, traps moisture against shingles and accelerates decay. While moss can sometimes be removed, extensive growth often indicates poor drainage or ventilation, which can contribute to premature roof failure.

Flashing and Penetration Problems:

Damaged or missing flashing around chimneys and vents creates entry points for water infiltration that can cause extensive hidden damage. Metal flashing deteriorates over time, and rubber boots around penetrations crack due to UV exposure and temperature fluctuations.

Multiple layers of shingles from previous roof-overs create weight stress and make inspection of underlying conditions impossible. Building codes typically limit roof layers to two, and multiple layers often hide deck damage or ventilation problems that compromise the entire roof system.

Interior Signs of Roof Failure
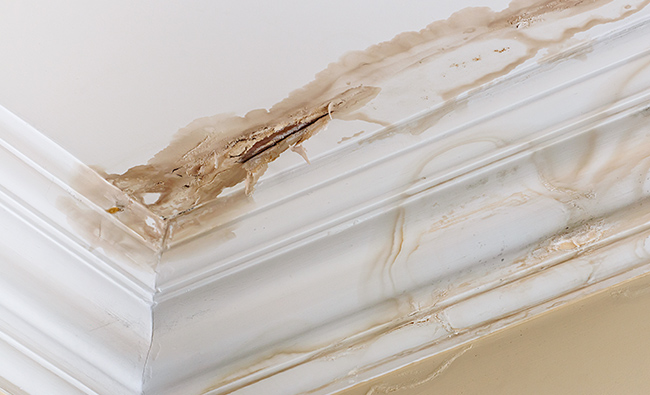
water stain on ceiling and wall indicates roof leak

Water Damage Evidence:

Water stains on ceilings or walls that keep growing indicate active leaks requiring immediate attention. Even small stains may represent significant hidden damage to insulation, framing, and other structural components that aren’t immediately visible.

The location and pattern of water stains help identify leak sources, but water can travel considerable distances from entry points before appearing on interior surfaces. Professional assessment helps determine whether localized repairs can address the problem or whether widespread damage requires complete replacement.

Attic Inspection Findings:

Daylight visible through roof boards in the attic indicates gaps, deteriorated materials, or structural damage that compromises weather protection. These openings also allow pests and moisture infiltration that can cause additional damage to stored items and building systems.

Musty odors indicating mold growth from moisture suggest long-term water infiltration that may have compromised insulation, framing, and other hidden building components. Mold remediation adds high cost to any roof replacement project, making early detection and action financially necessary.

Energy Performance Changes:

Sudden increases in energy bills due to air leaks often result from compromised roof systems that allow conditioned air to escape and outside air to infiltrate. Poor attic insulation performance from moisture damage reduces energy efficiency and increases heating and cooling costs.

Peeling paint or wallpaper near the roofline may indicate moisture problems or temperature fluctuations caused by roof system failures. These symptoms often accompany other warning signs and help confirm that roof replacement addresses underlying moisture and insulation issues.

Storm Damage Assessment

Severe weather events can instantly transform a serviceable roof into one requiring immediate replacement. Proper post-storm assessment protects your safety and ensures you don’t miss insurance coverage opportunities for legitimate damage claims.

Immediate Post-Storm Actions:

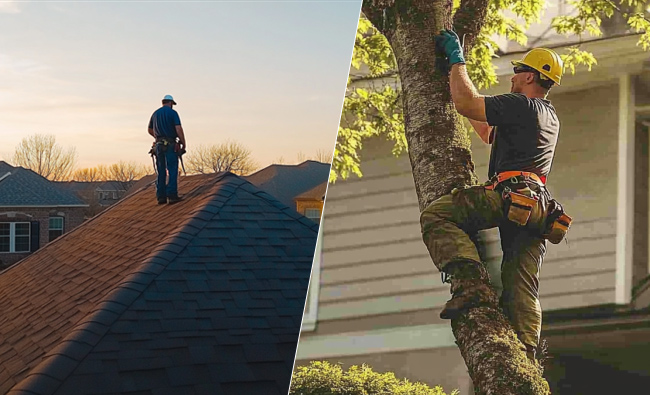
Inspect your roof within 72 hours after hailstorms or high winds, but prioritize safety over speed. Use binoculars to examine roof surfaces from the ground, and only climb onto roofs if you have proper safety equipment and experience.
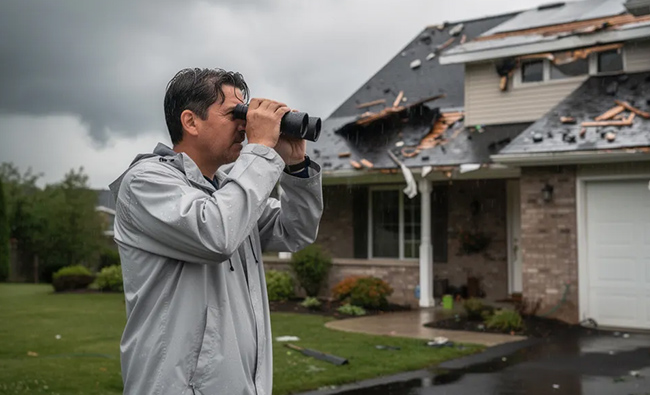
homeowner using binoculars to inspect their roof for storm damage

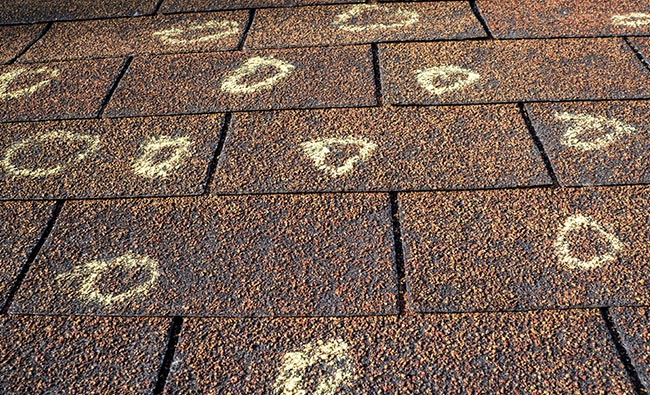
Look for dime-sized or larger hail damage marks on shingles, which appear as dark spots where impact has dislodged granules or created small depressions. Wind damage often appears as lifted, torn, or completely missing shingles, particularly along roof edges and ridge lines where uplift forces are strongest.

Damage Documentation Process:

Document missing shingles or exposed roof decking with photographs from multiple angles, including close-ups that show the extent of damage and wide shots that provide context. This documentation supports insurance claims and helps roofing contractors provide accurate replacement estimates.

Check for damage to gutters, downspouts, and roof vents, as these components are often impacted by severe weather. Damaged gutters may indicate that the roof received a significant impact that isn’t immediately visible from ground level.

Insurance and Professional Assessment:

Contact your insurance company within 30 days of storm damage to report potential claims and schedule adjuster inspections. Many insurance companies have specific timeframes for reporting weather-related damage, and delayed reporting can complicate claims processing.

Schedule a professional inspection even if the damage appears minor from your initial assessment. Trained roofing professionals can identify subtle damage that may not be obvious to homeowners but could lead to future leaks or accelerated deterioration if left unaddressed.

Storm damage often provides an opportunity to upgrade your entire roof system with insurance coverage, particularly when widespread damage affects multiple roof components or when existing materials don’t meet current building codes for wind or impact resistance.

Best Timing for Roof Replacement

Strategic timing for roof replacement can significantly impact project costs, quality, and convenience. Weather conditions, contractor availability, and seasonal demand all influence both pricing and installation quality.

Optimal Seasonal Windows:

Plan replacement during late spring (April-May) or early fall (September-October) when weather conditions provide consistent working days and moderate temperatures that don’t stress workers or materials. These seasons typically offer the best balance of favorable weather and reasonable contractor availability.

Avoid peak summer heat and winter weather delays when possible. Extreme heat makes working conditions dangerous and can affect material performance during installation. Winter weather creates safety hazards and may require special installation techniques that increase costs and project duration.

Scheduling and Planning Considerations:

Schedule your roof replacement 2-3 months in advance during optimal seasons to ensure contractor availability and avoid rushed installations. Popular roofing contractors often book several months in advance during peak seasons, so advance planning lets you choose the best contractor rather than settle for whoever has immediate availability.

Emergency replacements can be done year-round with proper precautions, but expect higher costs and potential delays during adverse weather conditions. Emergency work often requires temporary weather protection and specialized techniques that increase labor costs and material requirements.

Cost and Availability Factors:

Consider off-season discounts during winter months in moderate climates where installation remains feasible. Some contractors offer reduced rates during slower periods, though you must balance potential savings against weather-related installation risks.

Extreme weather events can trigger sudden demand spikes that strain contractor availability and drive up material costs. Major storms affecting large areas often lead to contractor shortages and price increases that can persist for months after the initial damage.

Regional factors also influence optimal timing. In New England and other northern climates, fall completion ensures protection before winter weather, while southern regions may find winter installation more feasible due to milder conditions.

Professional Assessment Guidelines

Selecting qualified roofing professionals and obtaining thorough assessments helps ensure accurate diagnoses of roof conditions and appropriate replacement recommendations. The assessment process helps you understand your options and make informed decisions about timing and materials.
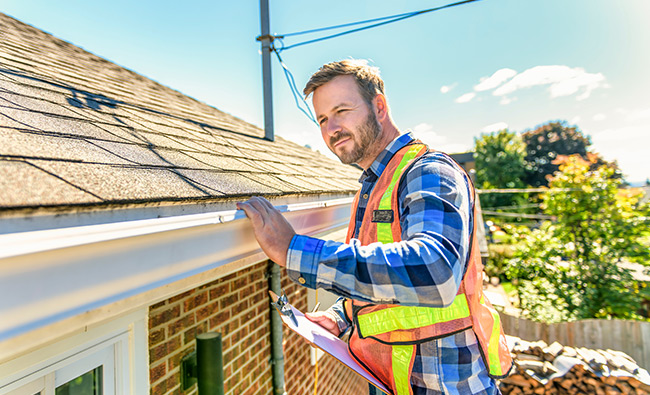
roof inspection

Inspection Scheduling and Frequency:

Get roof inspections every 2-3 years after your roof reaches 10 years of age to monitor condition changes and identify emerging issues before they become expensive problems. Regular maintenance inspections cost far less than emergency repairs and help you plan replacement timing.

Schedule inspections during dry weather to ensure accurate assessments of roof condition. Wet conditions can mask some damage indicators and create safety hazards that prevent thorough examination of roof surfaces and attic spaces.

Consider additional inspections after major storms, even if no apparent damage is visible from ground level. Professional inspectors have experience identifying subtle damage that may not be apparent to homeowners but could lead to future problems if unaddressed.

Contractor Selection Process:

Obtain three written estimates from licensed roofing contractors to compare pricing, materials, and installation approaches. Multiple estimates help you understand market pricing and identify contractors who provide thorough assessments versus those who offer quick quotes without detailed examination.

Request detailed material specifications and warranty information for both materials and workmanship. Quality contractors provide specific product information, installation methods, and clear warranty terms that protect your investment for years after installation.

Verify contractor licensing, insurance, and Better Business Bureau ratings before scheduling estimates. Licensed contractors must meet minimum competency requirements, and proper insurance protects you from liability for workplace accidents during your project.

Red Flags and Best Practices:

Avoid door-to-door contractors who appear after storms and may pressure you into quick decisions or demand large upfront payments. Legitimate contractors typically schedule appointments and provide written estimates without high-pressure sales tactics.

Be cautious of estimates that vary dramatically from others, either significantly higher or lower. Extremely low estimates may indicate corner-cutting or hidden costs, while unusually high estimates may suggest unnecessary work or premium pricing without corresponding value.

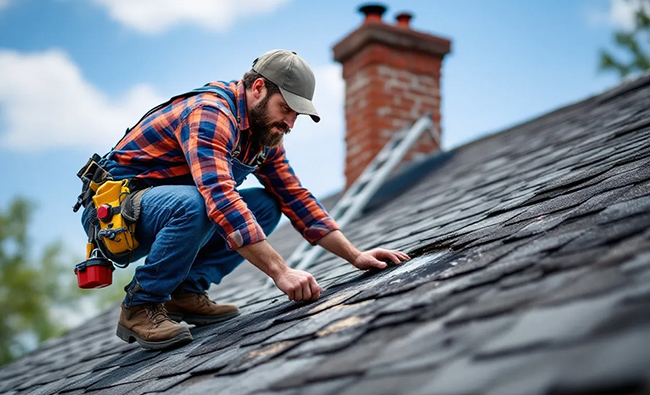
Quality roofing contractors should climb onto your roof or use drones/ladders to examine conditions rather than providing estimates based solely on ground-level observations. Thorough assessment requires close examination of shingle condition, flashing details, and ventilation systems.

Financial Planning for Roof Replacement

Understanding roof replacement costs and planning financing helps you avoid emergency situations that limit your options and potentially increase expenses. Early financial planning also allows you to take advantage of optimal timing and contractor selection opportunities.

Cost Expectations and Budgeting:

Budget $10,000-$30,000 for typical asphalt shingle replacement on average-sized homes, though costs vary significantly based on roof size, complexity, accessibility, and local labor rates. Simple ranch-style homes typically fall toward the lower end of this range, while multi-story homes with complex rooflines require higher budgets.

Premium materials such as metal or slate cost $25,000-$50,000 or more but offer a longer service life and may provide better energy efficiency, which can offset higher upfront costs over time. Consider lifecycle costs, not just initial installation expenses, when comparing material options.

Regional cost variations can be substantial, with areas experiencing high demand from recent storm damage or rapid growth commanding premium pricing. Urban areas with higher labor costs and stricter building codes may also increase project expenses compared to rural locations.

budgeting for roof replacement

Proactive Planning Strategies:

Start saving when your roof reaches 15 years old to avoid financial stress when replacement becomes necessary. Setting aside $100-200 per month starting at the 15-year mark typically accumulates sufficient funds for replacement by the time your roof approaches the end of its life.

Regular maintenance can extend roof life and delay replacement costs, but don’t continue spending significant money on repairs once your roof approaches 20 years of age. At that point, repair funds are often better invested in replacement planning.

Financing and Incentive Options:

Explore financing options, including home equity loans, personal loans, or contractor financing programs, to spread replacement costs over time. Home equity loans often provide the lowest interest rates, though they use your home as collateral for the loan amount.

Check for manufacturer rebates and energy-efficiency tax credits that may apply to your roof-replacement project. Some utility companies also offer rebates for energy-efficient roofing materials that reduce cooling costs in hot climates.

Insurance Considerations:

Compare insurance deductibles versus out-of-pocket replacement costs to understand your potential exposure from storm damage. Higher deductibles reduce premiums but increase your out-of-pocket expenses if damage occurs before the planned replacement.

Many homeowners find that proactive replacement eliminates uncertainty about insurance coverage and prevents disputes over whether damage resulted from wear and tear or from covered weather events. Insurance companies increasingly scrutinize claims on older roofs and may limit coverage based on roof age and condition.

Understanding your home insurance policy’s roof-replacement coverage helps you plan the timing and potentially coordinate the replacement with covered damage to maximize insurance benefits while ensuring adequate protection for your home and family.

Replacing Your Roof Conclusion

Knowing when to replace your roof requires careful consideration of age, condition, and warning signs that indicate your home’s protection is compromised. The key factors include material-specific lifespans, visible deterioration indicators, storm-damage assessments, and financial planning that enables proactive rather than reactive replacement decisions.

Most asphalt shingle roofs require replacement every 15 to 25 years, while premium materials such as metal or slate offer much longer service life. However, age alone doesn’t determine replacement timing – you must also evaluate warning signs like missing shingles, granule loss, water stains, and structural issues that indicate immediate attention is needed.

Professional assessments from qualified roofing contractors provide the expert evaluation needed to make informed decisions about repair versus replacement. Regular inspections, proper documentation of any storm damage, and advance planning for seasonal scheduling help ensure your roof replacement project proceeds smoothly and provides maximum value for your investment.

If your roof shows any of the warning signs discussed in this guide, schedule a professional inspection to assess its condition and plan your next steps. Taking action before emergency situations arise protects both your family’s safety and your long-term financial interests while ensuring you have time to make the best decisions for your home’s protection.

Roofing the Villages
(352) 293-2449

For the original version of this article visit: https://roofersthevillagesfl.com/when-to-replace-your-roof/

Thursday, July 31, 2025

Choosing the Right Metal Roofing Gauge

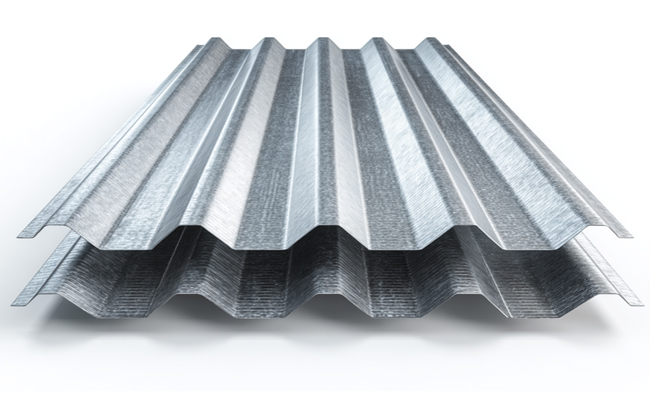
When researching metal roofing, understanding metal roofing gauge is key. The gauge tells you the thickness of the metal panels. This measurement is crucial because it impacts the roof’s durability and performance. In this article, we’ll explore what ‘metal roofing gauge’ means, how different gauges compare, and how to choose the right one for your needs.

difference of metal roofing gauge

Key Takeaways

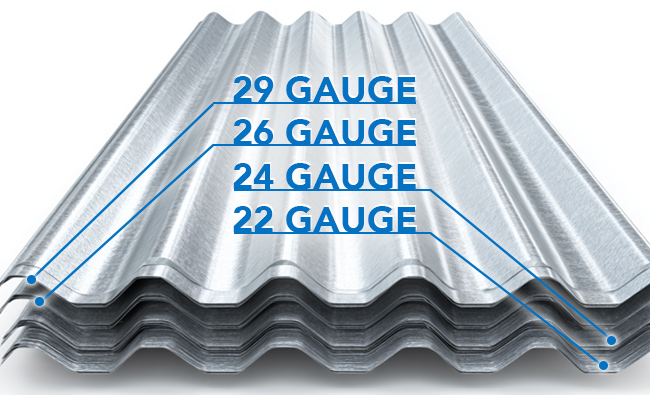
  • Metal roofing gauge most often comes in 22, 24, 26, and 29, with lower numbers indicating thicker and more durable options, crucial for weather resistance and longevity.
  • Choosing a suitable gauge depends on building type, local climate, and budget, with thicker panels recommended for harsh conditions and environments demanding reinforced structural integrity.
  • Thicker gauge panels offer enhanced weather resistance and durability, while thinner panels can be cost-effective for mild climates and less demanding applications.

Understanding Metal Roofing Gauge

A metal roofing gauge indicates the thickness of the metal panel. It is an important measurement when determining the durability and quality required for a property. Key points about metal roofing gauge:

  • The gauge number inversely relates to the thickness: the lower the gauge number, the thicker the metal.
  • A 22-gauge metal roof is thicker than a 24-gauge roof.
  • The thickness difference directly impacts the roof’s durability and performance

Thicker gauges, such as 22-gauge, offer superior durability, making them ideal for areas with harsh weather conditions. They are more resistant to damage from heavy rain, snow, and high winds. On the other hand, thinner gauges, such as 29-gauge, are less durable but can be suitable for less demanding environments.

Selecting the correct gauge has a significant impact on the roof’s ability to withstand environmental stresses, influencing both maintenance needs and overall longevity. Understanding these basics sets the foundation for making an informed choice that balances cost, durability, and performance.

Common Gauges in Metal Roofing

The most commonly used metal roofing gauges are:

  • 22-gauge
  • 24-gauge
  • 26-gauge
  • 29-gauge

common gauges used in metal roofing - 22, 24, 26 and 29 gauge

22-Gauge Metal Roofing

22-gauge metal roofing is the thickest and most durable option available, with a thickness of 0.0299 inches. Its benefits include:

  • Exceptional resistance to severe weather conditions, such as high winds and heavy snowfall
  • Superior protection for your building
  • Unparalleled durability, leading to less frequent maintenance
  • Fewer repairs over time. Homeowners often choose 22-gauge metal roofing for these reasons.

While 22-gauge metal roofing can add to the overall cost, its long-term benefits justify the investment. The robustness and longevity of 22-gauge panels make them a worthwhile choice for those prioritizing durability over initial cost.

24-Gauge Metal Roofing

24-gauge metal roofing is a popular choice for both commercial and upscale residential buildings, offering a balance between cost and strength. It offers a good balance of durability and affordability, making it a popular choice for various applications. The typical cost for 24-gauge standing seam metal roofing is between $2.50 and $3.50 per square foot. This price range reflects standard market rates for this material.

Compared to 22-gauge metal roofing, 24-gauge metal roofing is thinner but still provides excellent durability. It is often used in applications where a lower gauge is not necessary, offering adequate protection in areas with moderate weather conditions.

26-Gauge Metal Roofing

26-gauge metal roofing is widely used in both residential roofing and commercial settings, thanks to its decent durability and affordability. With a thickness of 0.0188 inches, it strikes a balance between performance and cost. This gauge is particularly appealing to homeowners seeking budget-friendly solutions without severely compromising on quality.

While 26-gauge metal roofing offers reasonable durability, potential issues, such as leaks, should be considered with certain panel types. Evaluate the specific needs of your project to determine if 26-gauge metal roofing is the best choice.

29-Gauge Metal Roofing

29-gauge metal roofing is the thinnest option available, measuring 0.0142 inches in thickness. This makes it the least expensive choice among metal roofing options. Despite its thinness, 29-gauge metal roofing is commonly used in homes across the United States for applications that do not require heavy load-bearing, such as siding and decorative features.

This standard gauge is particularly suitable for smaller sections or decorative purposes, offering significant cost savings. Precautions should be taken when walking on a 29-gauge roof to avoid damage, such as stepping only on support beams.

Choosing 29-gauge metal roofing can result in overall installed cost savings.

Factors Influencing Gauge Choice

Several factors influence the choice of metal roofing gauge, including the type of building, local climate conditions, and cost considerations. These factors are crucial in determining the appropriate gauge for your specific project, ensuring the chosen metal roofing performs well under the given conditions.

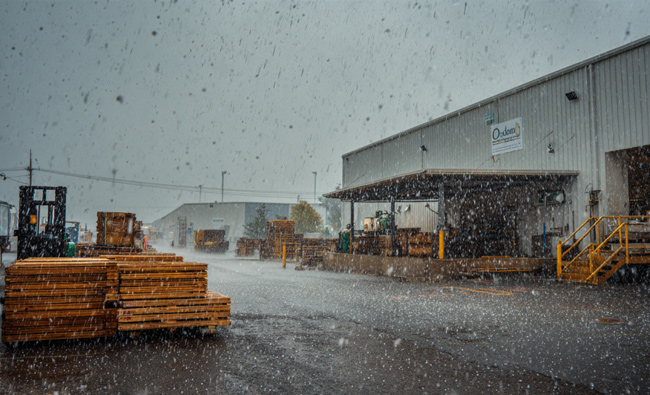
metal roofing warehouse building

Building Type and Structural Support

The type of building significantly impacts the choice of metal roofing gauge:

  • Thicker panels provide better structural support in open-framed buildings, making them essential for post-frame constructions that span between trusses.
  • Thicker gauge panels are typically required for heavier loads.
  • Using thicker panels enhances the overall structural integrity of the building.

Consider the construction type, location, and customer priorities when selecting a gauge. Thicker metal panels are often recommended for buildings needing robust structural support. This ensures the roofing system can withstand various stresses and maintain its integrity over time.

Climate and Weather Conditions

Local climate and weather conditions are crucial in determining the appropriate metal roofing gauge. In areas with severe weather, such as high winds or heavy snowfall, using thicker gauges, like 22-gauge, provides better resistance and durability. Thicker gauges can also reduce damage risks in areas prone to hail.

For regions with a mild climate, 24-gauge or 26-gauge metal roofing can be an ideal choice, offering a good balance of durability and cost. Thicker gauges are better suited for extreme weather conditions, ensuring the roofing system can handle the stresses of harsh environments.

If you live in Florida, check out: Best Residential Metal Roofing for Florida

Cost Considerations

Cost is a significant factor when choosing a metal roofing gauge. Thicker gauges generally entail higher material cost and installation costs due to increased material usage. For instance, 22-gauge metal roofing is the most expensive option among standard gauges.

On the other hand, 26-gauge metal roofing is less expensive than 22 and 24-gauge options, making it more appealing for budget-conscious projects. The cost difference between 26-gauge and 29-gauge metal roofing can range from 10% to 20% for material costs, with 29-gauge being the cost-effective choice for non-harsh climate areas.

Measuring Metal Roofing Thickness

Accurately measuring the thickness of metal roofing ensures you select the right gauge for your project. A tape measure can be used effectively, though it might lack the precision of other tools. To measure thickness using a tape measure, first locate the measurement in millimeters and then convert it to inches by multiplying by 0.03937.

Calipers are considered one of the most accurate tools for measuring metal thickness, making them ideal for precision work. Using reliable methods to measure metal roofing thickness ensures you have the precise information needed to make informed decisions.

Comparing Gauge Options for Different Applications

Different applications require different metal roofing gauges. For residential homes, 24-gauge metal roofing is commonly accepted as the industry standard, providing a balance between weight and durability. For homes in regions with heavy snow and strong winds, a minimum gauge of 24 or heavier is recommended.

In areas prone to hail, 26-gauge metal roofing offers moderate protection. For low-end agricultural jobs where cost efficiency is a priority, 26-gauge or 29-gauge wire is typically used.

Post-frame buildings, also known as pole barns, should utilize thicker metal panels that can withstand more substantial loads.

Advantages of Thicker Gauge Panels

thick gauge metal roofing panels sustaining harsh weather

Thicker-gauge metal roofing panels offer numerous advantages, including:

  • Higher resistance to weather-related damage, like hail and heavy rain
  • Improved resistance to severe weather conditions, such as high winds and heavy snow
  • Better protection against impacts, making them suitable for areas prone to hail. Additionally, metal roof panels provide enhanced durability and longevity.

A thicker metal roof can have a longer lifespan due to its enhanced structural integrity and weather resistance. Thicker gauge panels make for a more rigid metal roofing system, reducing the likelihood of bending or warping.

Overall, thicker panels enhance durability and offer more protection in roofing applications, utilizing high-quality roofing materials to provide an extra layer of security.

When to Opt for Thinner Gauge Panels

Thinner gauge panels are suitable in scenarios where cost-saving measures are prioritized, and the climate is mild. In residential construction, thinner gauge panels can be sufficient as the metal’s role is primarily to protect the underlying sheathing. Lighter gauge roofing, like 29-gauge, is often adequate in regions without extreme weather events, reducing overall costs.

The structural role of thinner panels is minimal if properly supported by structural sheathing and a weather-resistant barrier. This makes thinner gauge panels a practical choice for cost-effective roofing solutions in less demanding environments, ensuring they remain structurally sound.

Paint Systems and Their Impact on Gauge Availability

The choice of paint systems can impact the availability of different metal roofing gauges. The two primary types of paint systems for metal roofing are PVDF and SMP. PVDF coatings are more commonly specified in architectural applications due to their superior properties. However, light-gauge steel is not available with a PVDF paint finish, limiting options for thinner gauges.

Thicker-gauge materials often offer more color and finish options, thereby enhancing their aesthetic appeal. PVDF paint systems offer better color integrity and less fading compared to SMP. SMP finishes, on the other hand, can achieve textured appearances that help minimize the visual impact of imperfections in flat panels.

Read our blog post for more info and answers to Can You Paint Metal Roofing?

Installation Tips for Different Gauges

When installing metal roofing, the gauge you choose will impact the process and the required structural support. For example, 24-gauge metal roofing weighs 30 percent more than 26-gauge roofing, which can affect the structural support needed during installation. This makes it essential to ensure that the structure can handle the additional weight.

Using 24-gauge standing seam metal roofing offers the following advantages and considerations:

  • Allows for concealed fasteners, enhancing the weather-tightness and longevity of the installation.
  • For thinner gauges, such as 29-gauge, it’s crucial to step only on support beams to avoid damaging the panels.
  • Proper handling and fastening techniques will ensure a successful installation, regardless of the gauge, including exposed fastener options.

Metal Roof Gauge Summary

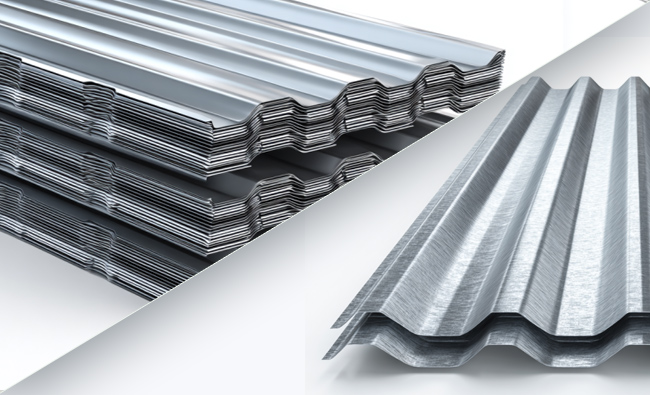
the best metal roofing gauge sheet panels

Choosing the best metal roofing gauge involves understanding the relationship between gauge and thickness, as well as considering factors such as building type, climate, and cost. Thicker gauges offer superior durability and weather resistance, making them ideal for harsh environments. Thinner gauges, while less durable, can be cost-effective solutions for milder climates and non-structural applications.

By weighing these factors, you can select the right gauge for your specific needs, ensuring a durable, long-lasting metal roofing system. Whether you’re a homeowner or a contractor, this guide equips you with the knowledge to make an informed decision, balancing performance, cost, and suitability for your project.

Frequently Asked Questions

What is the difference between 22-gauge and 29-gauge metal roofing?

The primary difference between 22-gauge and 29-gauge metal roofing is thickness, with 22-gauge being thicker and more durable for severe weather conditions, while 29-gauge is lighter and more cost-effective for milder climates. Thus, your choice should depend on the environmental conditions and structural needs of your project.

Why is 24-gauge metal roofing considered the industry standard?

24-gauge metal roofing is deemed the industry standard due to its optimal balance of cost and durability, making it ideal for a variety of applications. This gauge ensures longevity and performance, meeting the needs of both commercial and high-end residential projects.

How do climate and weather conditions affect the choice of metal roofing gauge?

Thicker metal roofing gauges, such as 22-gauge, are recommended for regions facing severe weather to ensure greater durability, while milder climates can utilize thinner gauges like 26-gauge or 29-gauge for cost-effectiveness. Ultimately, your choice should align with your local climate conditions.

What tools are best for measuring metal roofing thickness?

Calipers are the best choice for accurately measuring metal roofing thickness, although a tape measure can be used effectively with some conversion.

How does the choice of paint system impact the availability of different gauges?

The choice of paint system significantly impacts gauge availability, with PVDF systems predominantly suited for thicker gauges, whereas SMP finishes cater to both thicker and thinner gauges, offering a wider variety of colors and finishes.

Roofing the Villages
(352) 293-2449

For the original version of this article visit: https://roofersthevillagesfl.com/choosing-the-right-metal-roofing-gauge/

Thursday, April 24, 2025

Your Roof Maintenance Checklist

Need a roof maintenance checklist? The roof maintenance tips paired with this guide cover all the essential tasks, from inspections to cleaning gutters, to help you maintain a durable and safe roof that reaches its full life expectancy.

roof maintenance checklist

Key Takeaways

  • Regular roof inspections and maintenance are essential to prevent costly repairs and extend the roof’s lifespan, including checking flashing and drainage systems.
  • Cleaning gutters, trimming nearby trees, and removing moss and algae are critical tasks that help maintain effective water drainage and protect roofing materials from damage.
  • Engaging professional roofing contractors ensures compliance with building codes, provides expert inspections, and helps maintain the overall health and longevity of your roof.

Schedule Regular Roof Inspections

Routine inspections are essential for effective roof maintenance. Conducting them twice a year can significantly extend your roof’s lifespan by identifying minor issues early. Look for cracks, tears, and blisters, which, if ignored, can cause severe structural damage.

Engage professional roofing contractors for these inspections. Their trained eyes can spot issues that might be missed during a casual visual inspection. Professional inspections help identify potential leaks, damaged shingles, and other structural issues early, saving you from costly repairs in the future.

Address minor flaws promptly to prevent further damage. Staying proactive with inspections maintains the integrity of your roofing system and keeps your house safe.

Clean Gutters and Downspouts

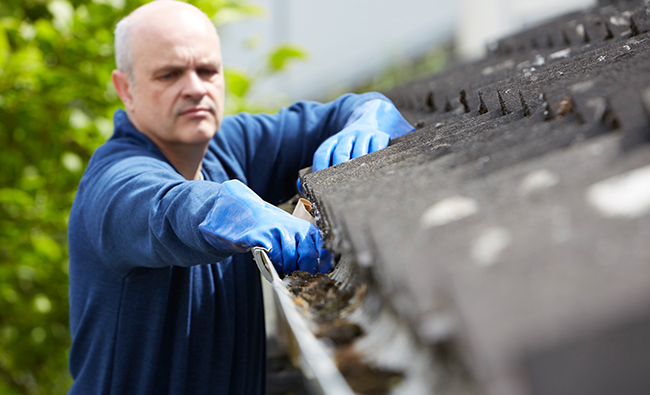
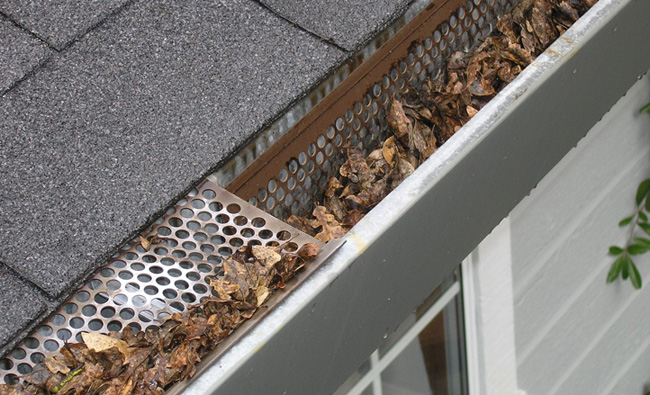
clean gutters and downspouts on a roof

Clean gutters and downspouts are crucial for proper water drainage. Clogged gutters can’t function effectively, leading to water infiltration and potential damage. Regular cleaning prevents moisture buildup, which can lead to moss growth and shingle degradation.

Gutters should be cleared regularly by removing leaves, twigs, and other debris. Ensure downspouts are securely attached and free of blockages to prevent water pooling. Installing kick-out flashing can further enhance gutter functionality by directing water flow effectively.

Neglecting this task can lead to severe issues, such as water damage to your home’s siding and foundation, and structural damage to the roof. Ensure your gutters are working correctly by regularly cleaning them.

Trim Nearby Trees

While nearby trees add beauty, their tree branches can become a menace if left unchecked. Overhanging branches can drop debris that traps moisture on the roof. Regularly trim these branches to prevent damage to the roof shingles.

Falling limbs can cause severe structural damage. Trimming branches that shade the roof can reduce moss growth by improving sunlight exposure, maintaining both the roof’s aesthetic appeal and longevity.

Schedule tree pruning and trimming sessions regularly, especially in the spring when trees are actively growing. Use the right tools, like a ladder and pruning shears, to safely remove overhanging branches and keep your roof clear of debris and potential hazards.

Inspect and Repair Flashing

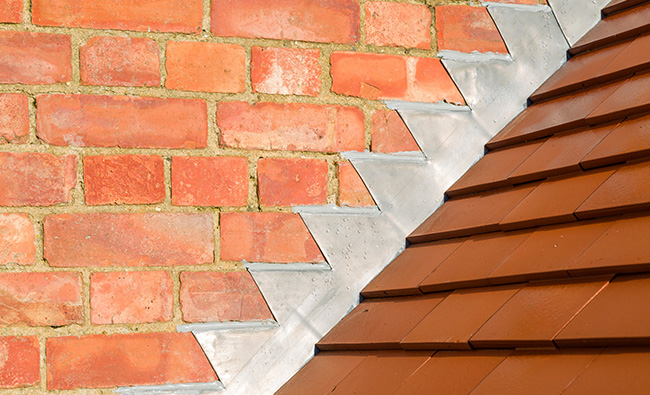
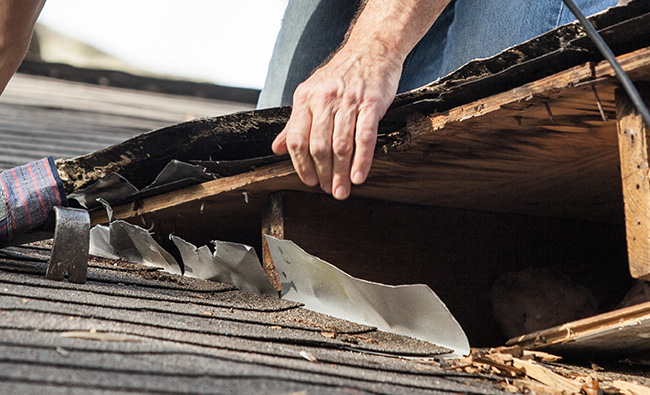
inspecting flashing on a roof

Flashing maintains a watertight seal where roof planes intersect, such as around chimneys, vents, and skylights. Regularly inspecting and repairing flashings prevents water leaks and ensures the integrity of your roofing system. Look for rust, gaps, or deterioration during inspections.

After storms, inspect the flashing for any damage. Use the right sealants to maintain the watertight seal and check caulking for cracks. Ensuring roof penetrations are sealed properly prevents leaks and extends the life of your roof.

Maintaining flashing can save you from costly repairs and help maintain your roof’s overall health. Make flashing inspection a regular part of your roof maintenance routine.

Remove Moss and Algae

Moss and algae may give your roof a rustic charm, but are harmful. Moss growing on shingles retains moisture, leading to deterioration and reduced roof lifespan. Moss growth can also obstruct proper drainage, resulting in potential water damage and leaks.

To combat moss, remove any organic matter and debris buildup on the roof. Use a gentle, eco-friendly dish soap and horticultural oil solution to remove moss safely. Consider installing zinc or copper strips to inhibit moss and algae growth for long-term prevention.

Keeping your roof free of moss and algae enhances its appearance, ensures proper water drainage, and extends its lifespan. Regular maintenance and proactive measures are key to a healthy, moss-free roof.

Check Attic Ventilation

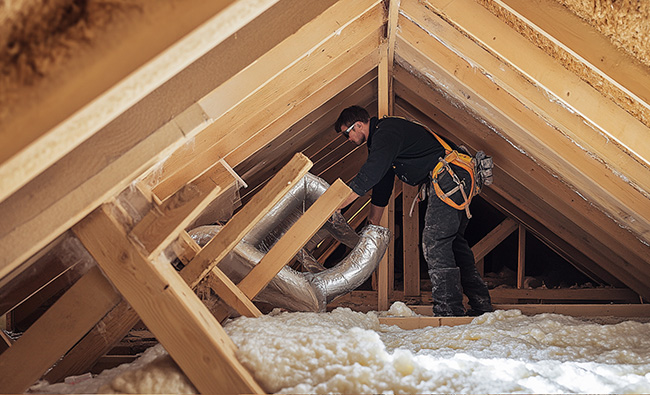
Proper attic ventilation is crucial for maintaining a healthy roof and preventing mold, mildew, and ice dams. Adequate ventilation pathways allow humid air to escape, replacing it with cool, dry air, which helps mitigate the risks of mold and mildew by preventing moisture buildup.

Check that vents are unobstructed and functioning correctly. Installing rafter vents can improve attic airflow, ensuring insulation and stored items do not block ventilation. Address any ventilation problems promptly to prevent moisture buildup from improperly vented appliances.

examine attic of a roof for damage

Proper attic ventilation supports overall roof health and energy efficiency, making it a critical component of roof maintenance.

Examine Roof Surface for Damage

Regularly examine your roof surface for signs of damage to detect issues early and prevent costly repairs. Look for blistering, cracking, tears, holes, abrasions, and loose or damaged pieces. Different types of roofs require different focus areas, such as checking tile and shingle roofs for loose or missing pieces and inspecting metal roofs for corrosion and damaged panels.

Use binoculars to inspect hard-to-reach vulnerable areas from the ground, or physically assess the roofing membrane for punctures and tears. Perform inspections after severe weather or high winds to catch any damage early. Address identified damage promptly to avoid costly repairs.

Staying vigilant and conducting regular inspections maintains the integrity of your roof and prevents minor potential issues from becoming major problems. Use a checklist to ensure nothing is overlooked during these roofing maintenance inspections.

Assess Drainage Systems

Effective drainage systems prevent water damage to your roof and home. Blocked drainage systems can lead to costly repairs. During heavy rainfall, unmaintained gutters can cause water to overflow, potentially damaging siding and foundation.

Regular inspections should include checking all roof drainage components for blockages. Verify that downspouts are securely attached and free of debris to ensure proper water drainage. Address damaged or improperly installed scuppers promptly to maintain effective water drainage.

Maintaining clean and effective drainage systems prevents water infiltration and protects your roof from potential leak damage.

Document Maintenance and Repairs

Keeping detailed records of all roof maintenance and repairs is crucial for future inspections and budget planning. A maintenance log helps track the history of roof work, allowing homeowners to plan for upcoming maintenance and budget appropriately. Note down any observed issues during inspections to ensure they are addressed promptly.

A systematic approach to documenting a maintenance checklist improves communication between homeowners and roofing contractors. This documentation helps identify recurring issues and plan preventative measures to avoid costly repairs.

Maintaining detailed records ensures your roof remains in top condition and extends its lifespan.

Engage Professional Roofing Contractors

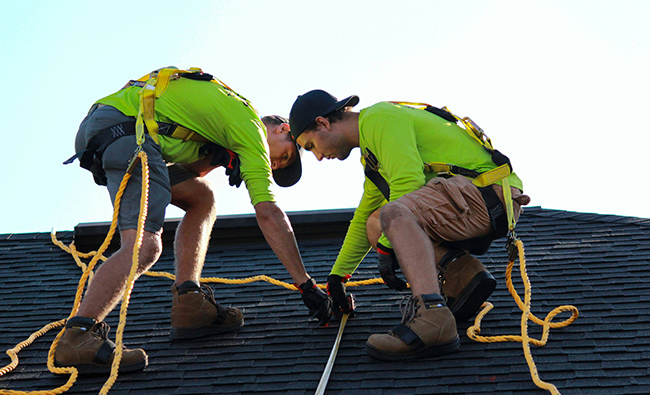
engage professional roofing contractors for roof maintenance

Hiring professional roofing contractors is essential for maintaining your roof’s health and longevity. Professional companies adhere to ethical standards, ensuring accountability. They apply precise techniques and use high-quality materials for a durable installation.

Local roofing contractors are knowledgeable about building codes and regulations, ensuring compliance. Engaging a professional roofer is crucial for addressing significant commercial roof damage that requires specialized tools and expertise. Engaging professional contractors ensures periodic inspections and maintenance of your commercial roofs.

Investing in professional roofing services provides access to extensive knowledge and tailored solutions for roof equipment issues, ultimately saving you money by preventing costly repairs.

Roof Maintenance Summary

Maintaining your roof requires a proactive approach and a comprehensive maintenance checklist. Regular inspections, cleaning gutters, trimming nearby trees, and engaging professional roofing contractors are essential steps to ensure your roof’s longevity and performance. Addressing issues promptly and documenting all maintenance and repairs are critical for effective roof management.

By following this checklist, you can protect your investment, prevent costly repairs, and ensure your roof remains in top-notch condition. Take action today and implement these roof maintenance practices to enjoy a safe, secure, and long-lasting roof.

Roof Maintenance Inspector Frequently Asked Questions

How often should I inspect my roof?

You should inspect your roof at least twice a year, ideally in the spring and fall, to ensure it remains in good condition. Regular inspections can help identify issues before they become major problems.

Why is it important to clean gutters regularly?

Regularly cleaning gutters is essential to prevent moisture buildup that can cause moss growth and potentially lead to water infiltration and structural damage. Keeping gutters clear safeguards the integrity of your home.

What are the benefits of hiring professional roofing contractors?

Hiring professional roofing contractors ensures high-quality workmanship, compliance with building codes, and access to warranty coverage, which ultimately guarantees a durable and reliable roof.

How can I prevent moss and algae growth on my roof?

To prevent moss and algae growth on your roof, regularly remove any debris, apply eco-friendly treatment solutions, and consider installing zinc or copper strips. These measures will help protect your roof’s integrity and appearance.

Why is proper attic ventilation important?

Proper attic ventilation is essential for preventing mold, mildew, and ice dams, as it allows humid air to escape, thus promoting roof health and enhancing energy efficiency. Prioritizing adequate ventilation can significantly extend the lifespan of your roof and improve your home’s comfort.

Roofing the Villages
(352) 293-2449

For the original version of this article visit: https://roofersthevillagesfl.com/your-roof-maintenance-checklist/

Wednesday, February 26, 2025

Top 7 Common Roof Repairs

Facing problems and need your roof repaired? This article covers the most common roof repairs, like leaks, broken shingles, etc. Find out how to spot these issues and tackle repairs to keep your roof in good shape.

common roof repairs

Key Takeaways

  • Address roof leaks promptly to prevent structural damage and perform regular maintenance to extend the roof’s lifespan.
  • Detect and replace damaged shingles immediately to maintain roof integrity and avoid further issues, especially in storm-prone areas.
  • Regular gutter maintenance and proper ventilation are essential in preventing water accumulation and moisture-related problems, which can compromise roofing materials.

Roof Leaks and How to Address Them

Roof leaks rank as one of the most prevalent issues for homeowners. They are a significant concern when it comes to roofing problems. A variety of factors can cause these issues. Examples include damaged flashing, missing shingles, and clogged gutters. Addressing roof leaks promptly is crucial to prevent further damage and preserve the structural integrity of your home.

Signs of a roof leak can often be identified through water stains on ceilings and walls or the presence of mold around the house. If you notice these signs, it’s crucial to locate the source of the leak. Start by inspecting common problem areas, such as around chimneys, skylights, and vents. Minor roof repairs can often be handled by resealing these areas or replacing damaged shingles.

For more severe roof repairs, such as significant water damage or structural issues, it’s best to call in a professional roofing contractor. Emergency roof repairs may be necessary if the leak poses an immediate threat to your home’s safety. Regular roof inspections and maintenance can help prevent leaks from occurring in the first place, ensuring your roof repair remains in good condition.

Preventing costly repairs is easier than you might think. Regular roof maintenance can significantly extend the life of your roof, such as cleaning gutters and checking for potential problem areas. Prompt attention to minor repairs helps avoid more severe issues and keeps your home safe and dry.

1. Damaged Shingles

damaged shingles on a roof that needs replacement

Damaged shingles are another common roofing issue that can lead to significant problems if not addressed. Routine roof inspections can help detect issues like cracked, warped, or missing shingles. Visible signs of shingle damage include dark stains, which could indicate the presence of moss or algae.

Shingles can be damaged by high winds, fallen trees, flying debris, or animals. Promptly replacing broken shingles maintains the roof’s integrity and prevents more extensive damage. If you live in a storm-prone area, replacing roof shingles immediately after a storm is critical to avoid further issues.

While replacing damaged shingles, you might face challenges such as finding an exact color match due to sun bleaching. A local roofing contractor can assist with replacing damaged shingles and ensuring a proper match. Prompt shingle repairs prevent structural damage and extend your roof’s lifespan.

2. Damaged Flashing

repairing damaged roof flashing

Flashing directs water away from critical areas on the roof, such as chimneys, vents, and skylights. Damaged flashing can lead to roof leaks and structural issues if not addressed promptly. Common signs of flashing damage include cracked seals, visible gaps, corrosion, water stains, and mold.

Repairing damaged flashing often involves resealing or replacing it to restore functionality. Improper installation can cause flashing to fail, leading to water flowing underneath the roofing materials and causing further damage. Regularly checking and fixing flashing issues is essential to ensure the roof’s integrity.

Noticing damaged flashing should prompt a call to a professional roofing contractor for assessment and repair. Timely repairs can prevent further damage and keep your roof in good condition. Maintaining your flashing helps avoid costly repairs and extends your roof’s lifespan.

3. Gutter Maintenance and Repair

Gutters play a vital role in your home’s roofing system by directing rainwater away from the house. They eliminate water accumulation from the roofline, directing it away from the home. Clogged gutters can worsen roof problems by leading to water overflow and potential damage to fascia boards, walls, and foundations.

Common problems that arise from clogged gutters include leaks, rot, and structural damage. Regular cleaning of gutters is necessary to prevent water backup that can damage shingles and other roofing materials. Gutters should be cleaned at least twice yearly, ideally in spring and fall, to prevent issues caused by accumulated debris.

clogged gutters on a house, leads to roof damage

If your gutters overflow despite being clean, inspect for possible gutter damage and improper slope. Regular maintenance and timely repairs are essential to avoid expensive problems and ensure that your gutters are functioning efficiently.. Maintaining your roof drainage system and gutters protects your roof and home from water damage.

4. Poor Ventilation Issues

Poor ventilation can lead to significant issues like moisture accumulation, which affects the integrity of roofing materials and overall roof health. Effects of poor attic ventilation include excessive heat buildup, which can cause roofing materials to age prematurely and increase energy costs.

Proper airflow in the attic improves ventilation. This helps reduce the risk of moisture accumulation and prevents mold growth.

If issues related to ventilation are identified, it is vital to hire a licensed contractor to investigate and implement necessary repairs for effective airflow. Maintaining a healthy roof and preventing costly repairs requires proper ventilation.

5. Ponding Water on Flat Roofs

Standing water on flat roofs, commonly called ponding water, can be caused by various factors, including inadequate drainage and structural issues. Ponding water should not remain on flat roofs for more than 48 hours to prevent damage to the roof structure and materials.

Clogged drains are a common cause of ponding water on flat roofs, leading to potential leaks and damage if not addressed. Installing additional drains can alleviate pooling water issues, especially near parapet walls. Silicone-based roof coatings are effective for areas experiencing ponding water when applied correctly.

In some cases, re-pitching or overlaying the roof with a new membrane might be necessary to address ponding issues and aged roofing material. If other repair methods are ineffective, a complete roof replacement might be required. Promptly addressing ponding water prevents significant damage and extends the life of your flat roof repairs.

6. Emergency Roof Repairs

tree damage for emergency roof repairs assessed by a roofing contractor

When water, fire, wind, or tree damage occurs, emergency roof repairs are necessary. Signs of an emergency include visible water leaks, large puddles on the roof, or major structural threats. Swift action and informed decisions are crucial during a roofing emergency to minimize damage.

During a roofing emergency, the first step is to contact a local roofing contractor. They will be able to assist you with the situation. Temporary tarping can be used to minimize damage until a professional can perform repairs. Documenting damage and taking photos can facilitate a smoother insurance claims process.

Immediate attention to ice dams on a roof is necessary to avoid water damage. Prompt emergency repairs prevent further damage and ensure your home’s safety. Always be prepared and know when to seek professional help to handle roofing emergencies effectively.

7. Preventive Maintenance Repairs

Regular inspections of the roof are essential. They help identify issues such as missing granules, cracks, and leaks. Scheduling at least one roof inspection per year can help identify potential problems early. Proper gutter maintenance, such as ensuring downspouts are connected, can prevent water from pooling on the roof.

Trimming trees and branches that are near the entire roof can prevent damage caused by falling limbs or abrasion. Preventive measures like timely repairs and maintenance can significantly prolong roof life and prevent costly repairs.

Proactive steps help maintain a healthy roof and avoid unexpected issues.

Choosing the Right Roofing Contractor

Choosing the right roofing contractor ensures quality work and protects your investment. Homeowners should check roofing contractors’ credentials to confirm a valid license and insurance. References from previous clients can offer insights into a contractor’s reliability and quality of work.

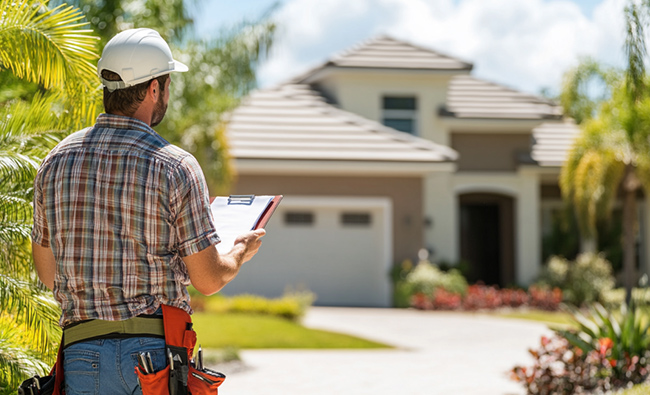
roofing contractor fixing damaged roof for homeowner

Obtaining multiple written estimates from roofing contractors allows for comparison of prices and services offered. Comparing quotes helps ensure competitive pricing and service evaluation for roof projects. Understanding the difference between a contractor’s workmanship warranty and the manufacturer’s warranty is crucial for long-term satisfaction.

Contractors that offer financing options may indicate financial stability and professionalism. A trustworthy contractor should provide a clear plan for their work and explain how the roofing system functions. Choosing the right contractor ensures your roofing project is completed to the highest standard.

Roof Repairs Summary

In conclusion, maintaining your roof is essential for the safety and longevity of your home. From fixing roof leaks and damaged shingles to handling poor ventilation and emergency repairs, addressing these issues with urgency can prevent costly repairs and prolong the life of your roof.

Regular inspections, preventive maintenance, and choosing the right roofing contractor are key to ensuring your roof remains in good condition. By taking proactive steps, you can protect your home and enjoy peace of mind knowing your roof is well-maintained.

Common Roof Repairs Frequently Asked Questions

What are the most common causes of roof leaks?

The most common causes of roof leaks are damaged flashing, missing shingles, and clogged gutters. Regular inspections and maintenance can help prevent these issues.

How can I identify damaged shingles?

To identify damaged shingles, look for visible signs such as dark stains, cracks, warping, or missing shingles. Addressing these issues as soon as you notice them can help prevent further damage to your roof.

What should I do if I notice damaged flashing?

If you notice damaged flashing, promptly call a professional roofing contractor for assessment and repair to prevent further damage. Taking this action can help safeguard your property from potential leaks and structural issues.

How often should gutters be cleaned?

Gutters should be cleaned at least twice a year, ideally in spring and fall, to prevent issues from debris buildup. Regular maintenance will help ensure proper drainage and avoid costly repairs.

Why is poor ventilation a problem for roofs?

Poor ventilation is a significant problem for roofs because it causes moisture buildup and excess heat, which can lead to premature aging of roofing materials. Ensuring proper ventilation is crucial for maintaining the integrity and lifespan of your roof.

Roofing the Villages
(352) 293-2449

For the original version of this article visit: https://roofersthevillagesfl.com/top-7-common-roof-repairs/

Saturday, December 28, 2024

Hail Damage Roofing Inspection Tips

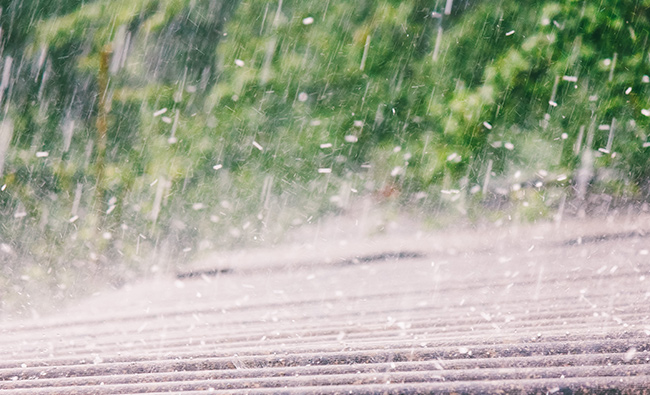
Hailstorms can wreak havoc on your roof, leading to both visible and hidden damage. Knowing how to conduct a thorough hail damage roofing inspection can save you from costly repairs down the line. This article will guide you through essential steps and tips for inspecting your roof after a hailstorm, ensuring you spot and promptly address any damage.

hail damage roofing inspection

Key Takeaways

  • Prompt roof inspections after hailstorms are essential to identify damage early and prevent costly issues such as leaks and mold growth.
  • Common signs of hail damage include dents, cracks in shingles, missing shingles, and damage to gutters and vents; checking for this should be included in any inspection routine.
  • Professional roofing contractors offer expert evaluations of hail damage, and homeowners should document any damage for insurance claims to ensure fair compensation.

Understanding Hail Damage

Hail damage can severely affect the appearance and functionality of your roofing materials, sometimes necessitating complete roof replacement. Prompt inspection after a hailstorm is crucial to identify damage early and prevent further issues such as leaks and mold. Ignoring hail damage can lead to significant roof damage, water leaks, and mold growth, which are far more costly and damaging in the long run.

hail damage on roof shingles

Hailstones can crack shingles and create holes, allowing moisture to compromise the roof’s integrity. Homeowners and property owners should be aware that hail can lead to significant damage, requiring immediate roof inspections. Recognizing these impacts is the first step in effectively managing and mitigating hail damage.

What Causes Hail Storms?

Hail forms as small hail nuggets that grow larger as they move up and down within thunderstorm clouds. The updrafts within these clouds carry the hailstones upward, adding layers of ice each time they rise and fall until they become too heavy for the updrafts to support, leading them to fall to the ground. A hail storm typically occurs during severe thunderstorms with strong winds that facilitate the formation and growth of hailstones, which can reach damaging sizes of one inch or larger.

Even small hailstones can cause significant hail damage to vulnerable areas like shingles, gutters, and vents, especially roof damage. The largest recorded hailstone in Colorado had a diameter of 4.83 inches, demonstrating the potential for severe damage.

Comprehending the formation and impact of hailstones underscores the seriousness of storm damage and the need for timely inspections.

Common Signs of Hail Damage

Common signs of hail damage on roofs include:

  • Dents
  • Cracks in shingles
  • Missing shingles
  • Torn flashing

Homeowners might notice visible dents and potential leaks after larger hail impacts a roof. Hail damage can weaken shingles, leading to leaks and further damage if not promptly addressed. Visual signs of hail damage on shingles include knocked-off surface granules and damage from impact.

Dents can also be found on gutters, gutter screens, and downspouts, suggesting hail damage. Additionally, roof vents and other roof components like flashing and metal valleys may show signs of dents or damage from hail impact.

Inspecting siding and windowsills for dents or dings can also indicate hail damage and should be included in your inspection routine.

Conducting a Hail Damage Roof Inspection

roofer inspecting a roof for hail damage

After a hailstorm, conducting a thorough roof inspection is essential to identify any obvious damage. Begin by visually inspecting your roof from the ground, looking for shingles, asphalt granules, fallen gutters, and other debris. Check for interior water damage in areas like the attic, living space ceilings, cabinets, and chimneys. Recognizing the types of hail damage—cosmetic and functional—is essential for assessing the overall impact on your roof.

For safety, use binoculars to check the roof condition without climbing up. Regular roof inspections, especially before hail season, can help identify vulnerabilities and prevent significant damage to your entire roof. Call a professional immediately if you find obvious damage to your roof.

Removing debris from your roof can also help prevent additional damage during hail events.

Safety Precautions

Always prioritize safety during a roof inspection by wearing proper safety gear and ensuring you have the necessary knowledge. Wear soft-soled shoes or roofing boots for safety when inspecting a roof for hail damage. It’s not recommended to get on your roof during an inspection unless you have experience in roof repair, as a lack of knowledge may lead to accidents.

To prevent potential injuries, avoid climbing onto your roof after a hailstorm. Expert help is available to ensure safe and thorough hail damage roof inspections.

Visual Inspection Checklist

After hail damage, inspect shingles, gutters, and roof vents for potential problems. Indicators of hail damage on shingles include missing shingles, granule loss, and hail marks suggesting compromised integrity.

During a gutter inspection, look for dents, dings, or sitting granules, as these can indicate damage. Check roof vents for dents and ensure they are not blocked; inspect flashing and metal valleys for hail impacts. A thorough visual inspection helps spot damage early and prevents further complications.

The Impact of Hail on Different Roofing Materials

Hail damage can result in both functional impairments and cosmetic issues on roofing materials. Functional hail damage affects the integrity and longevity of the roof, while cosmetic hail damage does not affect its performance. The impact of hail on roofing materials varies based on size, density, and the specific material’s characteristics.

hail damage different types of roofing materials

Asphalt Shingles

Signs of hail damage on asphalt shingles include bruised areas that resemble soft, black marks, pock marks or craters, and visible cracks or missing shingles. Hail can cause asphalt shingles to suffer from granule loss, exposing the underlying felt and increasing the risk of water damage and UV exposure.

Metal Roofing

Metal roofs are more durable than traditional asphalt shingles, providing better protection against hail damage. Dents on metal roofs can indicate hail impact, altering the roof’s appearance without necessarily compromising its integrity.

Wood Shingles

Hail can cause wood shingles to split, often resulting in cracks that may not show edge deterioration. Hail damage to wood shingles might include impact marks or dents, particularly near splits.

When to Call a Professional Roofing Contractor

If you observe visible damage after a severe hailstorm, engaging a professional contractor for a comprehensive evaluation is prudent. A roofer should review wind and hail damage immediately to prevent further issues.

It’s important for the contractor to inspect the roof with the insurance adjuster as the insurance company looks for reasons NOT to replace the roof. Call a professional contractor for a free roof inspection if you suspect hail damage.

Benefits of Professional Inspections

Professional roofing contractors provide expert assessments of hail damage. Professional inspectors can uncover damage that might not be visible to an untrained eye, ensuring thorough and accurate assessments.

At least two yearly professional inspections help identify vulnerabilities before they become serious issues. The National Roofing Contractors Association recommends bi-annual inspections for effective early detection of potential roofing issues.

Finding a Reputable Roofing Company

Seek out roofing inspectors with experience and a good reputation. Choose a reputable roofing contractor with experience in hail damage repairs.

Before hiring for hail damage assessments, verify a contractor’s credentials and insurance.

Navigating Insurance Claims for Hail Damage

homeowner discussing insurance claims for hail damage

The claims process can be complex, but it’s essential to understand homeowners insurance policies that often cover hail damage. Policies typically provide payment through a two-step process involving an initial Actual Cash Value payment and a subsequent depreciation payment.

Public adjusters work for policyholders independent of insurance companies. If you experience hail damage, it is advisable to call a public adjuster to assist with your insurance claim. Public adjusters advocate for policyholders in insurance claims to help secure fair compensation.

Documenting Damage

A camera is essential for documenting hail damage and ensuring safety during the inspection. Thorough photographs and detailed notes of roof damage are crucial when filing a claim. Roofing contractors document storm damage using photos and detailed notes.

Contractors can assist homeowners in inspecting and documenting hail damage if needed. If damage is found during the inspection, contractors provide pictures of the damage to submit to the insurance company.

Working with Your Insurance Company

Homeowners must inform their insurance provider promptly after noticing damage to initiate the claims process.

Role of Public Adjusters

Public adjusters are independent advocates for policyholders, helping them navigate the claims process effectively. They help negotiate a fair deal with the insurance adjuster to ensure adequate compensation for the damage. Public adjusters may charge a fee based on a percentage of the claim amount, which can impact the funds available for repairs.

Public adjusters guide homeowners through the entire insurance claims process, ensuring fair compensation.

Preventing Future Hail Damage

Routine maintenance identifies and addresses potential roof issues before they become significant problems. Impact-resistant materials minimize damage during future hail storms, adding an extra layer of protection for your roof.

Trimming trees near your roof can prevent branches from causing damage during hail storms. Storm shutters effectively protect windows and parts of your home from hail impact.

Regular Roof Maintenance

Regular inspections and maintenance ensure your roof can withstand hail storms and other damaging weather. Regular roof maintenance is crucial as it identifies and repairs potential problems before they lead to significant damage.

preventative hail damage steps

Regular roof maintenance involves inspecting for damage, cleaning gutters and downspouts, and repairing loose or damaged shingles. Trimming trees and shrubs around your property can prevent falling branches during hail storms, contributing to roof maintenance.

Impact-Resistant Roofing Materials

Impact-resistant roofing materials are engineered to endure hailstone hits and protect against such weather events. Using impact-resistant roofing materials prevents hail damage in the long term.

Concrete tiles are a durable option for impact-resistant roofing, lasting for many years.

Additional Protective Measures

Trim trees or shrubbery around your home to prevent falling branches from causing roof damage during hail storms. Storm shutters made of metal or wood provide effective protection against hail impact. Implementing additional protective measures can significantly mitigate potential hail damage to your roof.

Proactive steps like trimming trees and installing storm shutters safeguard your roof from hail damage.

Hail Inspection Summary

In conclusion, understanding and addressing hail damage is crucial for maintaining the integrity and longevity of your roof. Prompt inspections after a hailstorm, recognizing the signs of damage, and knowing when to call in professionals can save you from costly repairs and further complications. Different roofing materials respond to hail damage in various ways, and being aware of these differences can help you make informed decisions about your roofing needs.

Preventing future hail damage involves regular roof maintenance, using impact-resistant materials, and implementing additional protective measures. By staying proactive and informed, you can protect your home from the devastating effects of hailstorms and ensure your roof remains strong and durable for years to come.

Hail Damage Frequently Asked Questions

What are the first signs of hail damage on my roof?

The first signs of hail damage on your roof often include dents and cracks in shingles, as well as missing shingles and torn flashing. Additionally, look for dents on gutters, roof vents, and downspouts as further indicators of potential damage.

How can I safely inspect my roof for hail damage?

To safely inspect your roof for hail damage, use binoculars from the ground for a preliminary assessment, and only climb onto the roof if you have the proper knowledge and safety measures in place. Always prioritize your safety during the inspection.

When should I call a professional roofing contractor?

You should call a professional roofing contractor after severe weather events, like hailstorms, or if you notice visible damage to your roof. It’s essential to get a thorough evaluation to ensure your roof’s integrity.

How do I document hail damage for an insurance claim?

Documenting hail damage for an insurance claim requires taking clear photographs and detailed notes of the damage. If you cannot do it yourself, consider hiring contractors to assist with the inspection and documentation for submission.

What preventive measures can I take to protect my roof from future hail damage?

To protect your roof from future hail damage, implement regular maintenance, opt for impact-resistant roofing materials, trim surrounding trees, and consider installing storm shutters. These measures will help safeguard your roof effectively.

Roofing the Villages
(352) 293-2449

For the original version of this article visit: https://roofersthevillagesfl.com/hail-damage-roofing-inspection-tips/

Friday, December 27, 2024

Best Roofing Shingles for Florida

Choosing the best roofing shingles for Florida means selecting options that withstand heat, storms, and humidity. This Roofing the Villages guide covers top shingles that offer durability, weather resistance, and energy efficiency for Florida homes. Keep reading to find the ideal shingles for your roof.

best roofing shingles for florida - suitable for Florida's climate

Key Takeaways

  • Homeowners in Florida should prioritize roofing materials that offer durability, weather resistance, algae resistance, and energy efficiency due to the state’s challenging climate.
  • The top roofing shingle types for Florida include architectural asphalt shingles, metal roofing shingles, slate shingles, and solar roofing shingles, each providing unique benefits for extreme weather conditions.
  • Leading brands like GAF, Owens Corning, and CertainTeed offer high-quality shingles with robust warranties, ensuring long-lasting performance and protection against Florida’s severe weather.

Essential Considerations for Roofing Shingles in Florida

Florida’s climate poses unique challenges for roofing materials, including high humidity, intense heat, and UV radiation. Homeowners must select durable roofing materials that can endure the consistent rainfall, storms, and harsh weather conditions typical of the region. Key factors in choosing the best roofing shingles for Florida include durability, cost-effectiveness, and resistance to severe weather.

Florida homeowners should consider weather resistance, algae resistance, and energy efficiency. These aspects enhance not only the durability of the shingles but also the overall comfort and cost-effectiveness of maintaining a home in Florida’s climate.

Weather Resistance

In Florida, where wind gusts can reach up to 130 miles per hour, weather resistance is essential for roofing shingles. Heavyweight asphalt shingles are often preferred to withstand extreme weather conditions due to their increased wind resistance compared to standard options. A certain GAF shingle is known for its ability to withstand high wind speeds, making them a reliable choice for Florida homes.

Maintaining the integrity of the roofing system requires regular inspections and prompt repairs. Scheduling inspections twice a year helps identify early signs of wear or damage. Additionally, cleaning to remove mold or algae and applying protective coatings can prevent extensive deterioration, extending the roof’s lifespan.

Proper attic ventilation prevents heat and moisture buildup, prolonging the life of the shingles.

Algae Resistance

Florida’s high humidity fosters the growth of algae on roofing shingles, which can lead to roof deterioration over time. Algae-resistant shingles are specially treated to prevent algae growth, enhancing their durability and longevity.

In Florida, choosing algae-resistant roofing materials is necessary to ensure the roof remains in good condition.

Energy Efficiency

Energy efficiency is also vital for roofing shingles in Florida. Light-colored shingles reflect more sunlight, keeping homes cooler and reducing energy costs. Owens Corning has shingles that are designed to reflect more sunlight, absorb less heat, and improve a home’s energy efficiency. This creates a more comfortable indoor environment and reduces energy costs.

Some roofing materials offer excellent heat resistance and UV protection, which are crucial in Florida’s climate. Solar shingles, like those from GAF, provide a renewable energy source while enhancing energy efficiency. Choosing the right roof shingles can significantly reduce energy costs and create a more comfortable living space.

Top Roofing Shingle Types for Florida Homes

types of roofing shingles ideal for Florida homes, including architectural and metal options

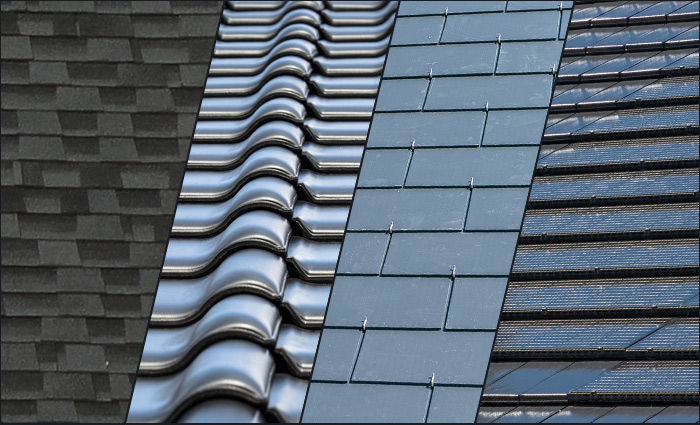
Selecting the right type of roofing shingle is crucial for ensuring protection against Florida’s extreme weather conditions. The most popular shingle types among Florida homeowners include architectural asphalt shingles, metal roofing shingles, slate shingles, and solar roofing shingles. Each of these options provides distinct advantages in terms of durability, weather resistance, and energy efficiency.

The most popular shingle types among Florida homeowners include:

  • Architectural asphalt shingles
  • Metal roofing shingles
  • Slate shingles
  • Solar roofing shingles

Let’s explore these top roofing shingle types in detail, highlighting their advantages and suitability for Florida’s climate.

1. Architectural Shingles

Architectural shingles are preferred among Florida homeowners due to their longevity and protective qualities. With an expected lifespan of 25-30 years, these shingles are designed to withstand Florida’s challenging weather conditions. Their thicker design provides enhanced wind resistance, making them more durable compared to traditional 3-tab shingles.

The multiple layers of material in architectural and dimensional shingles contribute to their improved durability and resistance to storm damage. They are also available in a variety of colors and styles, enhancing the aesthetic appeal of homes and often meeting homeowners’ association requirements.

Despite a slight cost difference compared to basic shingles, their superior performance makes architectural shingles a cost-effective choice.

2. Metal Roof Shingles

Metal roofing is renowned for its exceptional resilience to Florida’s harsh weather conditions. With their lightweight and high strength-to-weight ratio, metal roof shingles provide better energy efficiency and lower cooling costs in Florida’s warm climate. TAMKO metal roof shingles, for instance, are durable, low maintenance, and made of recyclable materials, making them an environmentally friendly choice.

Besides their energy efficiency, metal roofs offer unmatched durability and minimal maintenance, making them popular for Florida homeowners seeking long-lasting roofing solutions.

While metal roof shingles are more costly than asphalt architectural shingles, they often have a longer lifespan. Beware in coastal Florida areas, the salt can encourage rusting, but aluminum shingles are highly corrosion resistant.

3. Slate Shingles

Slate shingles are renowned for their timeless beauty and exceptional durability, making them a highly desirable roofing option. These shingles can endure Florida’s extreme weather conditions while maintaining their aesthetic appeal, performing well in rain storms and extreme temperatures.

Although slate shingles are significantly more expensive than other roofing options, their longevity and minimal maintenance needs provide a cost-effective solution over time.

Slate shingles, with a lifespan of up to 100 years, are a reliable investment for those intending to keep a property long-term and willing to pay upfront for lasting quality. Their high initial cost is balanced by their durability and low maintenance over time.

4. Solar Roofing Shingles

Solar roofing shingles offer significant benefits for homes in Florida, including enhanced energy efficiency and reduced reliance on traditional power sources. Unlike traditional solar panels, solar shingles blend seamlessly with the roof, providing both aesthetic and functional benefits.

GAF’s nailable solar shingles, for example, provide clean and renewable energy, significantly reducing utility bills while effectively protecting your roof and property structure.

Despite being a newer and more innovative option, solar shingles hold great potential for Florida homeowners seeking renewable energy solutions. Each silicon solar cell in systems like the Apollo II can generate up to 70 watts of power, making solar shingles a powerful addition to any home.

Leading Roofing Shingle Brands for Florida

popular roofing shingle brands including GAF and Owens Corning

When it comes to choosing the best roofing shingles, several brands stand out for their quality and durability. Popular brands of asphalt shingles suitable for Florida include GAF, Owens Corning, and CertainTeed. Many Florida homeowners trust these brands for their superior quality and innovative designs.

The following sections will delve into the specific advantages of GAF, Owens Corning, and CertainTeed shingles, helping you make an informed decision for your roofing project.

GAF Asphalt Shingles

GAF is well-known for its dedication to quality. The company also emphasizes innovation in its roofing products. GAF shingles come with a 50-year non-prorated material warranty, ensuring long-lasting performance and peace of mind for homeowners. The GAF Golden Pledge warranty further covers the durability and longevity of the roofing investment.

Although slightly more expensive, GAF shingles are durable and long-lasting, making them a cost-effective investment over time. Available in several styles, including 3-tab, architectural, and designer, GAF shingles cater to diverse aesthetic preferences.

Their high quality, durability, and excellent weather protection make GAF shingles a top choice for Florida homes.

Owens Corning Asphalt Shingles

Owens Corning provides various shingle styles, including traditional 3-tab, architectural, and designer shingles, enhancing both aesthetic appeal and functionality. TrueDefinition shingles from Owens Corning provide improved durability and wind resistance, making them suitable for challenging climates like Florida.

Although not the cheapest option, Owens Corning shingles are considered cost-effective due to their quality and performance. The varying warranty options of 10, 15, or 20 years provide flexibility, though they may not be as comprehensive as those from GAF and CertainTeed.

CertainTeed Asphalt Shingles

CertainTeed shingles are known for their exceptional quality and durability, making them a trusted choice for homeowners. Offering a wide variety of shingle styles, including 3-tab, architectural, and luxury designer options, CertainTeed mimics more expensive materials while providing excellent performance. Brands like CertainTeed often make the best roof shingles.

Their superior warranties are some of the best in the roofing industry, adding an extra layer of security for homeowners.

Installation and Maintenance Tips for Florida Roofs

professional roofer installing shingles on a Florida home - the installation process

Proper installation and regular maintenance maximize the lifespan of roofing shingles in Florida. Due to the state’s susceptibility to high winds and severe weather, stronger roofing materials are often required for adequate protection.

Here are practical tips on professional installation, regular maintenance, and post-storm inspection to help Florida homeowners keep their roofs in top condition.

Professional Installation

Hiring experienced roofing contractors ensures proper installation and warranty coverage. Improper installation can lead to leaks and wind damage, shortening the roof’s lifespan. Choosing a professional contractor ensures warranties that cover both materials and workmanship, providing additional peace of mind.

Shingles like slate require specialized installation due to their weight and complexity, emphasizing the importance of hiring skilled professionals.

Regular Maintenance

Regular maintenance helps identify small issues before they escalate, extending the lifespan of roofing shingles. Key maintenance practices include cleaning gutters, caulking cracked areas, and using softwash chemicals for algae treatment.

Cleaning gutters at least twice a year prevents water pooling and shingle deterioration. Proper maintenance involves inspecting the roof for signs of wear and tear and addressing small problems promptly to avoid costly repairs.

Inspection After Storms

Post-storm inspections quickly identify potential damage, maintaining the integrity of your roof. Prompt post-storm inspections prevent further complications like water leaks and additional structural issues.

During inspections, look for visible damage, such as missing shingles, dents, or debris accumulation. Timely repairs after identifying damage will mitigate further risks and protect your home from severe weather impacts.

Best Florida Shingles Summary

Choosing the best roofing shingles for Florida involves considering various factors such as weather resistance, algae resistance, and energy efficiency. Architectural shingles, metal roof shingles, slate shingles, and solar roofing shingles each offer unique benefits suitable for Florida’s climate. Leading brands like GAF, Owens Corning, and CertainTeed provide high-quality options with strong warranties, ensuring durability and peace of mind for homeowners.

By understanding the importance of proper installation and regular maintenance, Florida homeowners can extend the lifespan of their roofs and protect their homes effectively. Make informed decisions about your roofing project to enjoy a durable and efficient roofing system that withstands Florida’s unique climate challenges.

Florida Roofing Shingles Frequently Asked Questions

Why are architectural shingles preferred for Florida homes?

Architectural shingles are preferred for Florida homes due to their longevity, superior wind resistance, and appealing aesthetics, enabling them to better withstand the state’s challenging weather conditions compared to traditional 3-tab shingles.

What makes GAF shingles a good choice for Florida homeowners?

GAF shingles are an excellent choice for Florida homeowners due to their durability, exceptional weather protection, and robust warranties, ensuring reliable performance in the state’s challenging climate.

How do algae-resistant shingles benefit homes in Florida?

Algae-resistant shingles significantly enhance the durability and longevity of roofs in Florida’s humid climate by preventing algae growth. This treatment helps maintain the aesthetic appeal and structural integrity of homes.

What are the energy efficiency benefits of metal roofing in Florida?

Metal roofing significantly enhances energy efficiency in Florida by reflecting sunlight and minimizing heat absorption, which contributes to reduced cooling costs.

Why is professional installation important for roofing shingles?

Professional installation is crucial for roofing shingles as it guarantees proper placement and adherence to manufacturer guidelines, thus protecting your warranty and minimizing the risk of leaks and wind damage. This ultimately contributes to a longer lifespan for your roof.

Roofing the Villages
(352) 293-2449

For the original version of this article visit: https://roofersthevillagesfl.com/best-roofing-shingles-for-florida/

Roof Types for Insurance

Your roof does more than keep the rain out. For insurance companies, it’s one of the first things they evaluate when deciding how much to ch...