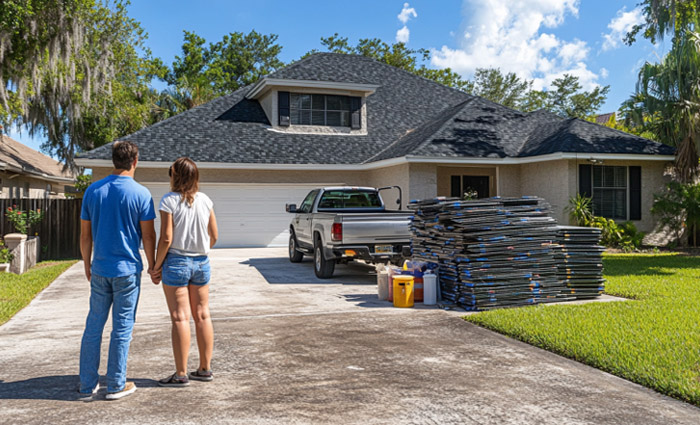
Showing posts with label Roofers the Villages. Show all posts

Friday, September 27, 2024

Should I Stay Home During Roof Replacement?

Are you wondering if you should stay home during a roof replacement installation? This article helps you decide by weighing the noise, safety risks, and daily disruptions you might face. We will guide you through all you need to consider to make the best decision.

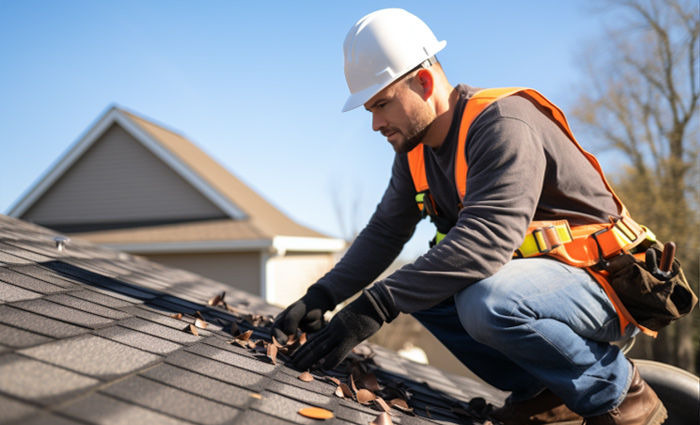
should i stay home during roof replacement

Key Takeaways

  • Roof replacement creates significant noise and disruptions, which can be challenging for families, particularly those with young children or pets.
  • Safety is a major concern during roofing projects; homeowners should avoid designated construction areas to prevent accidents and consider potential hazards.
  • While staying home allows for better supervision and potential cost savings, it also brings noise and inconvenience, making alternatives worth considering.

Evaluating Noise Levels and Disruptions

Roof replacement generates significant noise, with constant banging and hammering disrupting sleep and daily routines. These loud noises can be particularly distressing for elderly individuals or young children who are sensitive to loud noises. Pets can also feel stressed and anxious due to the noise and presence of strangers. Relocating them to a quieter environment, like a friend’s house or a boarding facility, can help manage their stress.

Staying home means dealing with significant disruptions. The noise can make concentration difficult, particularly for those who work from home. Temporarily leaving can help make the process more bearable.

Safety Considerations During Roof Replacement

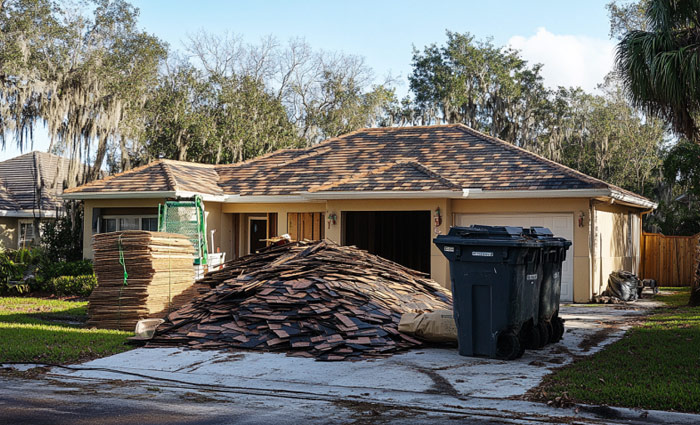
Safety is a primary concern during roof replacement. Your home turns into a construction zone, raising the risk of accidents. Contractors use heavy equipment and tools, and roofing materials and debris will be scattered around, so it’s important to avoid areas where debris may fall.
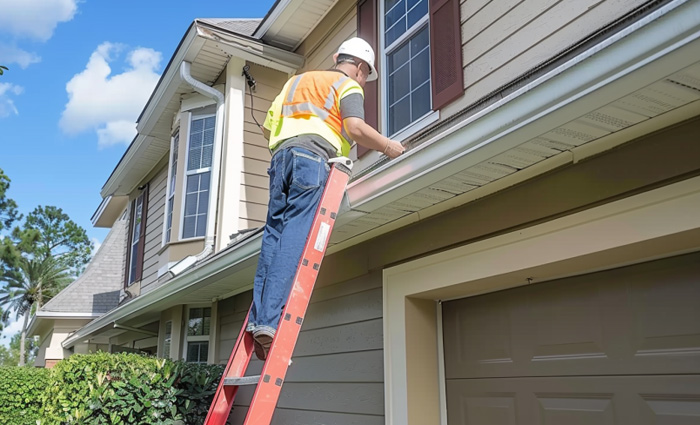
safety considerations during roof replacement

Roofing contractors typically ensure workers use proper safety gear like harnesses, helmets, and slip-resistant shoes to prevent accidents. Most roofing contractors use clear signage around the construction area to inform others about potential dangers. Homeowners should agree on a designated entry and exit point to maintain safety.

Homeowners must be aware of hazardous materials like asbestos or paint fumes that require proper handling. Staying home can lead to significant disturbances and safety concerns, so weighing these factors is essential.

Protecting Your Property

Protecting your property during a roof replacement is crucial. Many homeowners move or cover outdoor furniture and plants to shield them from debris and dust. An angled tarp can protect landscaping, including flowerbeds, lawns, and pools, from roofing debris.

Clearing the driveway allows access to roofing equipment and waste disposal. Removing objects mounted on walls can prevent damage from vibrations during the roofing work.

Duration of the Roof Replacement Process

The roof replacement process usually takes one to two days for an average-sized home. A 3,000 square feet or less house typically takes about one full day. However, factors like accessibility issues related to landscaping or tight urban spaces can cause delays, as can discovering structural damage.

Weather conditions also play a significant role. Cold or inclement weather can prolong the roof replacement due to safety concerns and adjustments needed for material handling. The roof’s steepness and the complexity of the roofing materials can further extend the installation time.

Being present allows homeowners to conduct final inspections and ensure the job meets expectations.

Pros of Staying Home During Roof Replacement

pros of staying home during roof replacement

Staying home during roof replacement offers several advantages. Homeowners can supervise the contractors, ensuring the roofing work meets their standards. Direct communication with the roofing team allows for timely feedback and better-informed decisions.

It can also save money on temporary accommodations and other related costs.

Supervision and Communication

Staying home allows direct communication with the roofing team, enabling timely feedback and quick, informed decisions. Homeowners can closely monitor the work to ensure it meets expectations.

Effective communication can prevent misunderstandings and ensure the project runs smoothly. This hands-on approach can significantly improve overall work quality.

Cost Savings

Staying home during a roof replacement can lead to significant cost savings, as it eliminates the need to pay for temporary accommodations.

So, for homeowners interested in cost savings, staying home might be more reasonable as it can significantly reduce the overall cost of the investment.

Quality Control

Quality control is crucial during any roofing project. Staying home allows homeowners to supervise the work directly, ensuring quality service. Being present enables you to monitor progress and address concerns in real-time.

While staying home exposes you to irritating noises and vibrations, maintaining excellent quality control outweighs these inconveniences.

Cons of Staying Home During Roof Replacement
noise, falling debris, and disturbance caused by roof replacement

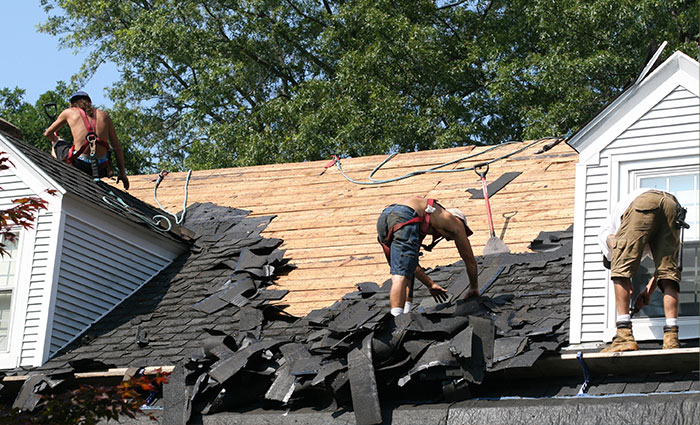
Despite the benefits, staying home during roof replacement has drawbacks. The noise can be incredibly disruptive, reaching rock concert levels. Safety hazards like falling debris and restricted areas pose significant risks.

Additionally, limited access to different parts of your house and coordination issues with roofers can make the experience challenging.

Noise and Disturbance

Roofing work typically creates a loud and continuous noise environment. The constant banging and hammering can disrupt sleep patterns for infants and pets. For remote workers, this makes concentration and maintaining productivity difficult. The stress from the noise can make daily routines challenging to manage.

Pets, in particular, can become anxious due to the noise and unfamiliar activity. Consider their well-being and possibly relocate them during the roofing project.

Safety Hazards

Safety hazards are a significant concern during roof replacement. Falling debris and dust pose risks to anyone in or around the house. Stay out of the construction crew’s way and avoid restricted areas to ensure safety.

While staying home is generally safe, homeowners must be aware of potential hazards and follow all safety precautions. Clear communication with the roofing contractor about safe zones and times to avoid certain areas can help mitigate these risks.

Inconvenience

Staying home during roof replacement can be highly inconvenient. Limited access to different areas of the house and constant coordination with roofers can disrupt your daily routine. This interaction and adjustment can be tiring and may hinder your usual activities.

Alternatives to Staying Home

If staying home seems overwhelming, consider alternatives. You might stay with a friend’s house or family to avoid the disruption, providing a peaceful environment away from the noise and stress.

Engaging in outdoor activities or visiting local attractions can be a great way to spend your day. Exploring cafés and local shops or participating in community events can help you make the most of your time while your existing roof replacements are being replaced, especially if you have an old roof.

Preparing Your Home if You Stay

Proper preparation is key if you decide to stay home during the roof replacement. Move vehicles to a safe location to minimize the risk of damage and keep the work area clear for contractors. Removing fragile items like wall art can prevent damage from vibrations.

Planning for your pets is also essential. The noise from the roofing work can make them anxious, so ensuring their comfort and safety is crucial. Taking these steps can help mitigate disruptions and make the experience more manageable.

Summary
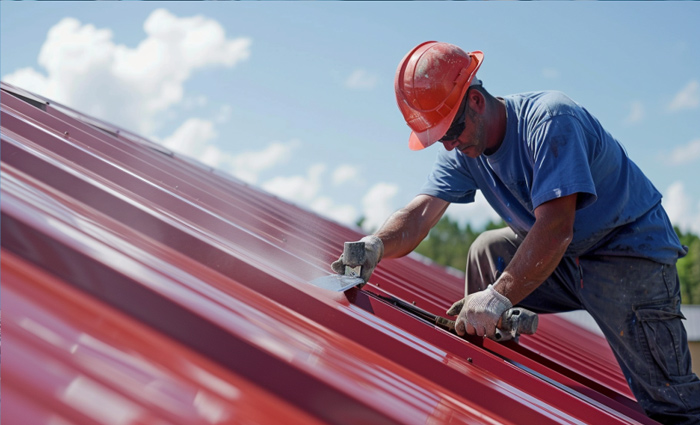
roof replacement

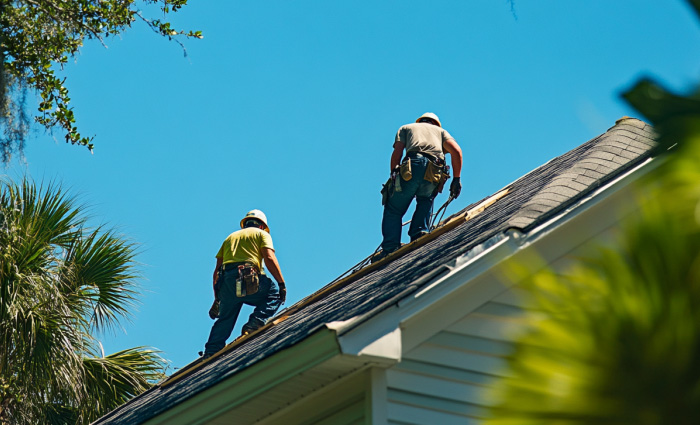
In summary, deciding whether to stay home during a roof replacement involves weighing multiple factors, including noise levels, safety concerns, and project duration. While staying home allows for better supervision and communication with the roofing team, it also comes with significant drawbacks like noise and inconvenience.

Ultimately, the decision depends on your circumstances and preferences. Taking the time to prepare your home and considering alternatives can help you navigate this challenging but necessary home improvement project.

Frequently Asked Questions

Will the noise be unbearable during roof replacement?

Yes, the noise during roof replacement can be pretty loud, similar to a rock concert, making it disruptive for sleep and daily activities. It’s a good idea to plan for some noise and find ways to cope during the process.

Is it safe to stay home during roof replacement?

It’s generally safe to stay home during a roof replacement, but be aware of potential hazards like falling debris. Make sure to stay clear of restricted areas for your safety.

How long does a typical roof replacement take?

A typical roof replacement usually takes one to two days, but keep in mind that weather and structural issues can extend that timeframe. It’s good to be prepared for some variability!

What are the benefits of staying home during roof replacement?

Staying home during roof replacement lets you supervise the work directly and communicate quickly with the roofing team; plus, you can save money by not needing temporary accommodations. It’s an easy way to stay informed and involved in the process!

What should I do to prepare my home if I decide to stay?

To prepare your home if you decide to stay, move vehicles to safety, take down fragile items from walls, and make a plan for your pets’ care. This way, you’ll be better equipped to handle any disruptions.

Roofing the Villages
(352) 293-2449
For the original version of this article visit: https://roofersthevillagesfl.com/should-i-stay-home-during-roof-replacement/

Friday, June 28, 2024

Can You Paint Metal Roofing?

Can you paint metal roofing? Absolutely. Painting your metal roof can boost its appearance and extend its lifespan. This guide covers everything from the benefits and paint options to preparation and application. Read on to discover how to transform and protect your metal roof efficiently.

can you paint metal roofing

Metal Roofing Key Takeaways

  • Painting metal roofs is feasible and beneficial for aesthetics and longevity, but newly installed roofs should weather for six months before painting.
  • Choosing the right paint is crucial; acrylic latex and oil-based paints are popular for their durability and resilience against weather conditions.
  • Proper roof preparation, including cleaning, removing rust and loose paint, and applying primer, is essential for a successful and long-lasting paint job.

Yes, You Can Paint Metal Roofing

Painting a metal roof is not only feasible but also advantageous for roof maintenance if you wish to extend the life of a metal roof. Whether you’re looking to refresh an existing metal roof or revive a rusty metal roof, the right approach can breathe new life into your home’s crowning glory. From the versatile aluminum to the stately copper, every type of metal roofing material is a canvas awaiting a fresh hue. The age-old debate of form versus function finds its truce here, as you can change your roof’s color to suit your aesthetic while simultaneously offering it protection and elongating its life.

However, before commencing the painting process, consider the age of your metal roof. Newly installed metal roofs have a bit of waiting in store – about six months – to properly weather before they’re ready to put on a new coat. This gestation period ensures the paint adheres well and lasts longer. And if you’re staring at a rusty metal roof, fret not, for with the right metal primer and paint designed for the task, even a surface weathered by time can be restored to its former glory.

Benefits of Painting Metal Roofs

metal roof with improved appearance after painting

Visualize a shield that simultaneously defends and deflects attacks. This is how a new coat of paint affects your metal roof. By sealing the roof surface with a fresh coat of paint, you create an impregnable barrier against rust, corrosion, and the ravages of Mother Nature. This isn’t just about aesthetics; it’s about extending your roof’s lifespan, with roof paints lasting a decade or more. And as the painted surface reflects sunlight, it reduces heat absorption, keeping your abode cooler and your energy bills lower – a true win-win.

But the cherry on top? Curb appeal. A painted metal roof isn’t just a practical choice; it’s a style statement. Selecting the right color can harmonize your home’s exterior, making it stand out in the neighborhood and potentially boosting your property’s value. Beyond the surface, painting a metal roof is a commitment to the home’s long-term beauty and efficiency.

Choosing the Right Paint for Metal Roofing

Choosing suitable paint for your metal roof is comparable to picking out the ideal armor—it must be tough, durable, and fit for the battle against the elements. With options ranging from acrylic to polyester and silicon-based paints, it’s crucial to pick a formula that not only adheres well but also stands up to the unique challenges your roof will face.

Types of Paint

Acrylic latex paint has become a favorite for metal roofing due to its resilience and flexibility, accommodating the metal’s natural expansion and contraction – a particularly suitable choice for modern homes with galvanized metal roofs. Conversely, oil-based paints are lauded for their superior adhesion and durability, making them the go-to for those seeking longevity from their roof paint job.

For a versatile option that offers excellent coverage and resilience, Diamond Brite’s General Purpose Oil-Enamel is a stellar choice and works on various metal surfaces.

For rolled steel roofs, look into high-quality exterior acrylic paints like Sherwin-Williams’ Superpaint or Benjamin Moore’s Regal are recommended, ideally paired with an alkyd bonding primer for optimal adhesion. And for those direct-to-metal (DTM) painting endeavors, Benjamin Moore’s UltraSpec stands out as a prime candidate.

choosing the right paint

Factors to Consider

The paint selection for your metal roof goes beyond merely selecting a color from a range. The type of metal roofing material, your local climate, and the desired levels of weather resistance all play significant roles in the selection process. The paint must fend off UV rays, resist rain and wind, and, in some cases, prevent rust in humid coastal areas. And let’s not forget the environmental impact – today’s eco-aware homeowner aims for options that are as kind to the planet as they are to the eye.

Preparing Your Metal Roof for Painting

Before introducing the paint, a metal roof must undergo a careful and detailed preparation process. Ensuring your metal roof is pristine and primed is the unsung hero of the painting saga. From power washing to priming, each step is a critical prelude to the final act of applying paint.

Cleaning the Roof Surface

The path to a flawless paint job begins with a clean canvas. Utilizing a pressure washer, sweep away the accumulated tales of yesteryear from your roof surface. Be it stubborn mold or everyday grime, a thorough cleanse with the right tools will ensure that your new paint adheres as it should.

Remember to ensure the underlying metal is completely dry before moving forward—patience here ensures excellence later.

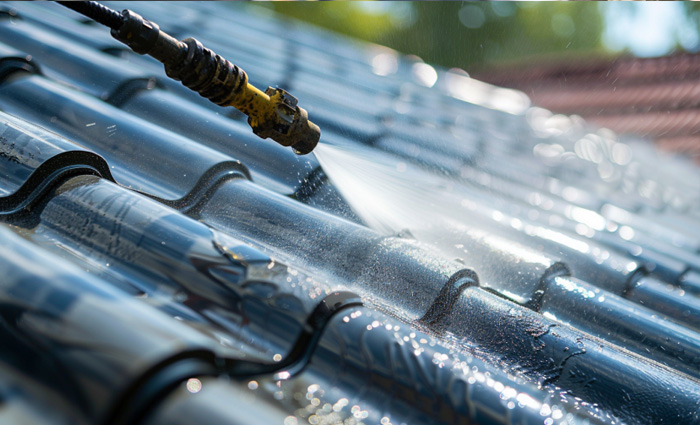
roofer cleaning a metal roof with a power washer

Removing Loose Paint and Rust

Once the cleaning is complete, turn your attention to the battle scars on your metal roof. With a trusty wire brush, banish any rust that tarnishes the surface. Scrape away any loose paint, but approach this task carefully—the goal is to create a smooth surface for the new paint, not to wage war on the metal itself.

Applying Primer

Once the roof surface is clean and smooth, applying a galvanized metal primer is up next. This trusty undercoat is the secret handshake between metal and paint, ensuring a bond that lasts through seasons and storms.

To enhance the paint’s adhesion and brightness, apply a generous coat of primer, preferably one imbued with titanium dioxide.

The Painting Process

Equipped with the appropriate paint and a well-prepared roof, you are set to commence the DIY painting project. This is where your vision comes to life as you apply the first strokes of color to redefine your home’s skyline. Remember to choose a temperate day, ideally in the spring or fall, to avoid the pitfalls of extreme temperatures.

Applying the First Coat

The moment of truth arrives with the first coat. Whether you’re wielding a paint sprayer or a paint roller designed for corrugated metal, ensuring even coverage is your mantra. And though eagerness may urge you to press on, allow the primer at least an hour to dry before introducing the paint to the roof.

Adding Additional Coats

Patience is a virtue, especially when it comes to the drying time between paint coats. With each layer, your metal roof gains strength and vibrance, but rushing this process can lead to a less-than-stellar finish. Adhere to the manufacturer’s instructions and allow the paint to fully embrace the metal before adding another layer to your roof.

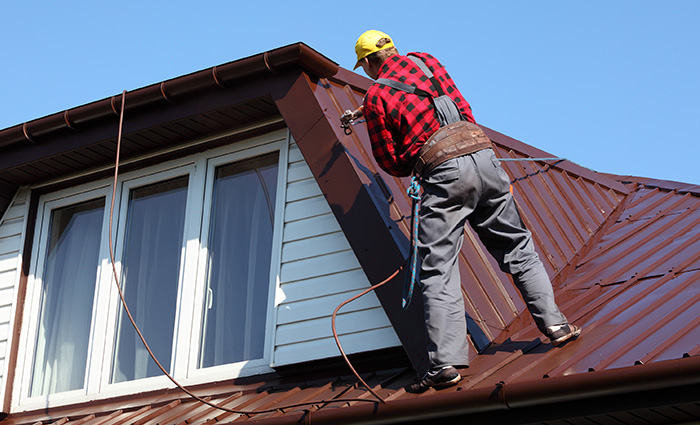
painter painting a metal roof home in The Villages Florida

Safety Tips for DIY Metal Roof Painting

It’s pertinent to remember that painting a metal roof comes with certain hazards. Safety is paramount as you climb to new heights in your DIY project. Each piece of safety gear, from the shoes on your feet to the harness around your chest, is a vital component of a successful painting project.

Using Proper Safety Gear

In roof painting, the adage ‘better safe than sorry’ couldn’t be more applicable. Equip yourself with a harness securely attached to a sturdy point on your home, and wear non-slip shoes to ensure a firm foothold. These precautions are not mere formalities but the difference between a job well done and a disastrous tumble.

Working with a Partner

Venturing onto your roof solo is a tale for the fearless, but even the bravest warriors can benefit from the support of an ally. A partner serves not just as an extra pair of hands but as a crucial lookout, ensuring that each step is taken with the utmost caution. So enlist a trusted friend or hire help to secure ladders, help manage the equipment, and provide peace of mind as you transform your roof.

Cost Considerations for Painting Metal Roofs

Like any significant endeavor, painting a metal roof incurs various expenses. The range can be as broad as the roofs themselves, with factors such as size, paint quality, and whether you choose the DIY route or professional services all influencing the final tally.

DIY vs. Professional Services

For DIY enthusiasts, taking on the challenge of painting a metal roof can be a way to save on labor costs. However, this path demands an investment in both time and equipment, from power washers to paint sprayers.

On the other hand, hiring a professional comes with a price per square foot but also provides expertise and guarantees that can last up to 15 years.

Additional Costs

Beyond the paint and labor, other considerations may add to the cost. Resealing the roof before painting is one such expense, and the thorough cleaning required before the first brushstroke can also impact your budget.

Maintenance Tips for Painted Metal Roofs

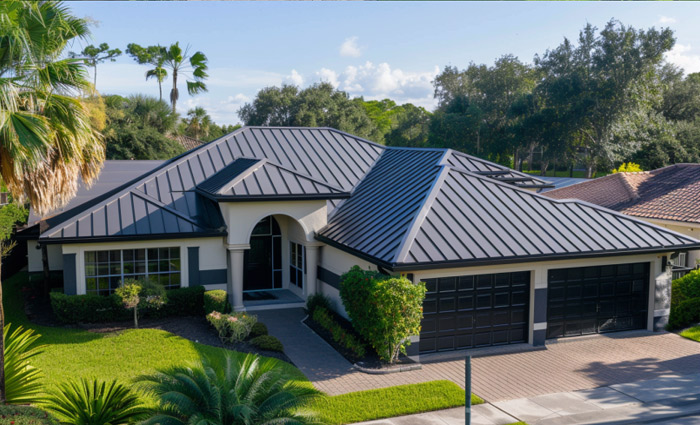
nice home in The Villages Florida with a painted metal roof

After the painting is completed, maintaining the beauty of your metal roof commences. Regular inspections and cleanings, particularly after the seasons change, will go a long way in preserving the integrity and appearance of your painted roof.

From ensuring gutters are clear to touching up scratches with a paint pen, proactive maintenance is the guardian of your roof’s longevity.

Metal Roofing Paint Summary

In the tapestry of home improvement, painting a metal roof is a thread that weaves aesthetics, protection, and value together. By understanding the ins and outs—from preparation to the painting process and ongoing maintenance—you can ensure your metal roof looks beautiful, lasts, and protects your home.

Frequently Asked Questions

Here are a few of the common questions roofersthevillagesfl.com gets about metal roof painting:

Can all types of metal roofs be painted?

Yes, all types of metal roofs can be painted to improve their appearance and durability.

What are the benefits of painting my metal roof?

Painting your metal roof offers protection against the elements, enhances energy efficiency by reflecting sunlight, and improves your home’s appearance, potentially increasing its value.

How do I choose the right paint for my metal roof?

When choosing the right paint for your metal roof, consider the type of metal, local climate, and the paint’s weather resistance and environmental impact. Acrylic latex and oil-based paints are popular for their adhesion and durability.

How much does it cost to paint a metal roof?

Painting a metal roof can cost from $1,160 to $3,600, depending on factors such as roof size, paint quality, and the choice of DIY or professional services. Consider these factors to estimate the cost-effectively.

What safety gear do I need to paint my metal roof?

To paint your metal roof, you need a harness, safety rope, and non-slip shoes to prevent falls. Having a partner can also provide extra safety and assistance.

Roofing the Villages
(352) 293-2449

For the original version of this article visit: https://roofersthevillagesfl.com/can-you-paint-metal-roofing/

Friday, May 31, 2024

Clay Tile Roof

Are you considering a clay tile roof for your home? Then, you’re looking at a roofing solution known for its durability, classic beauty, and rich heritage. A clay tile roof excels in longevity, resists harsh weather, and offers a timeless aesthetic appeal, but it is also important to consider its weight, installation requirements, and maintenance needs. This article delves into the intricacies of clay tile roofing, giving you the information necessary to decide If clay tile roofing is suitable for your home, from understanding costs to maintenance tips.

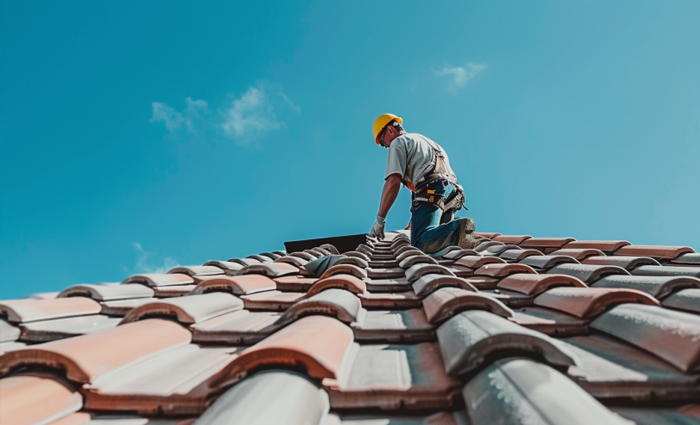
clay tile roof installation the villages fl

Key Takeaways

  • Clay tile roofs boast a timeless aesthetic appeal suitable for various architectural styles. They have a rich history and diverse styles available and can enhance a home’s curb appeal and architectural consistency.
  • While offering excellent durability, longevity, and resistance to harsh weather, clay tile roofing requires careful consideration of weight, cost, and potential for structural reinforcements, making it a significant financial investment.
  • Clay tile roofs require professional expertise for installation and maintenance, and routine inspections and repairs are crucial to their long-term preservation. Alternative roofing options should be considered for their unique advantages and challenges.

The Enduring Elegance of Clay Tile Roofs

Clay tile roofs are not just a mere covering for your home; they are a statement of elegance and a testament to timeless design. The allure of terra cotta clay tiles is universal, transcending cultures and centuries to offer a classic look that complements a wide array of architectural styles.

Whether gracing the slopes of a Mediterranean villa or adding a refined touch to a modern abode, clay tiles provide an aesthetic value unmatched by other roofing materials and roof types.

The Rich History and Variety of Clay Tile Styles

styles of clay tiles including barrel, flat, French, and Spanish tiles

The journey of clay tiles began over 5,000 years ago, and their tradition has been cherished and adapted through the ages. From the curved profiles of barrel tiles that grace Spanish rooftops to the elegant French tiles with their unique flutes, the variety of clay tile styles is as rich as their history.

The versatility of clay tiles and slate tiles allows them to be crafted into shapes that can mimic traditional wood shakes or the classic S-shape of Spanish tiles, making them suitable for an array of climates and architectural demands.

Matching Clay Tiles to Your Home’s Architecture

Choosing the right clay tile style is key to maintaining architectural consistency and boosting your home’s curb appeal. Mediterranean and Spanish-style homes often feature the high-profile silhouette of barrel tiles, while French clay tiles lend a touch of European grandeur to historical residences.

Flat tiles, especially those made of clay, provide a sleek, minimalist aesthetic for the contemporary home. The rustic charm of Italian clay tiles is perfectly suited for Tuscan-inspired architecture.

Unveiling the Pros and Cons of Clay Tile Roofing

Clay tile roofs are lauded for their durability and aesthetic appeal; however, they come with their own set of considerations. While homeowners may be drawn to the potential increase in home value and the suitability of clay tiles for hot climates, it’s important to acknowledge their susceptibility to cracking and the significant maintenance they require. These factors must be carefully weighed against the benefits to make an informed decision.

durability and resistance of clay tiles

Longevity and Resistance: The Strengths of Clay Tile

The resilience of clay tiles is evident in their remarkable longevity, which often exceeds a century. These tiles stand up to the harshest elements, from fierce winds to punishing hail, while boasting a Class A fire rating, providing homeowners with peace of mind and a sense of security.

The reputation of clay tile roofing, a popular choice for clay roof installations, is built on this blend of durability and resistance, similar to slate roofing. In fact, slate roofing systems offer a comparable level of quality and longevity.

Considerations Before Installation: Weight and Cost Implications

Considering the practical implications of installing clay tile roofing is essential before you fall in love with its beauty. The substantial weight of terra cotta clay tiles demands a robust roof structure, which may necessitate costly reinforcements. Additionally, removing old roofing materials to make way for new clay tiles can significantly increase the project’s overall expense.

Understanding the Investment: Clay Tile Roofing Costs

Investing in a clay tile roof goes beyond an aesthetic upgrade; it involves a serious financial commitment that needs thoughtful consideration. With costs ranging from $7 to $25 per square foot, including labor, clay tile roofing is an investment that necessitates a long-term perspective. The price per square foot for materials alone averages around $6, highlighting the significance of labor in the total cost.

Price Per Square Foot: Estimating Your Clay Tile Roof

When estimating the cost of a new clay tile roof, it’s important to factor in both the cost of materials and labor. The material costs for clay tiles can vary, with interlocking tiles at the lower end of the spectrum and premium options like barrel tiles on the higher side. Labor costs, influenced by the complexity of the roof’s design, can significantly add to the investment.

Long-Term Savings: Energy Efficiency and Maintenance

The benefits of a clay tile roof include:

  • Immediate visual appeal
  • Significant energy savings
  • Insulating properties that contribute to a reduction in cooling costs, especially during warmer months
  • Light-colored terra-cotta tiles with higher solar reflectance offer additional energy efficiency benefits.

clay tile roof visual appeal

Over time, clay tiles’ durability can result in long-term cost savings compared to other roofing materials that may require more frequent replacement or costly repairs.

Maintaining the Majesty: Clay Tile Roof Upkeep

Keeping a clay tile roof in majestic condition requires diligent maintenance, including regular inspections and professional cleaning. Promptly addressing issues such as inadequate flashing or compromised roof integrity can prevent the escalation of minor problems into major repairs.

Additionally, sealing tiles after cleaning can simplify future maintenance efforts and maintain the roof’s aesthetic quality.

Routine Roof Care: Inspection and Cleaning Tips

Regular inspections are crucial to safeguarding the integrity of clay tile roofs, particularly in regions susceptible to heavy snow or extreme weather conditions. Cleaning to remove debris and prevent moss or mold growth is an important part of routine maintenance.

regular inspection and cleaning clay tile roofs

Due to the safety concerns and expertise required, it is advisable to enlist the services of a professional for these tasks.

When Repairs are Needed: Handling Broken or Cracked Tiles

In case of broken or cracked tiles, it’s vital to carry out prompt repairs to prevent further damage to the roof. The process involves carefully removing the damaged tiles and replacing them with new roofing tiles that match the existing roof’s appearance.

While clay tile roofs may require more frequent maintenance than other roofing types, their longevity justifies the effort.

Installing Clay Tile Roofs: What You Need to Know

Installing a clay tile roof is an intricate task that requires specialist skills and a comprehensive knowledge of the material’s distinctive characteristics. The heavyweight of clay tiles often requires additional support from the roof substructure, and meeting the minimum slope requirements is essential for effective drainage and preventing leaks.

The Right Way to Install: Ensuring Proper Technique

Employing the correct installation methods is crucial for ensuring a clay tile roof’s long-term durability and optimal performance. Every step in the installation process contributes to the roof’s overall integrity, from ensuring the correct slope to installing an ice barrier in regions prone to ice damming. Incorrect methods or inadequate flashing can drastically reduce the lifespan of clay tiles and compromise the roofing system.

proper installation of clay tile roofs

Choosing the Right Contractor: Compare Quotes and Experience

Choosing an experienced contractor for clay tile roof installation is as crucial as the materials’ quality. Homeowners should consider the following when selecting a contractor:

  • Compare quotes
  • Assess the experience, licensing, insurance, and reputation of potential contractors
  • Consider the contractor’s commitment to safety protocols
  • Look for a comprehensive warranty on materials and workmanship

By considering these factors, homeowners can ensure they choose a reliable and skilled contractor for their clay tile roof installation.

Alternative Roofing Materials: Comparing Clay Tiles to Other Options

When exploring roofing options, homeowners should also consider alternatives like concrete tiles, metal roofs, wood shakes, and asphalt shingles. Each material offers its own set of advantages and challenges, and understanding these can help homeowners make decisions that align with their preferences and requirements.

Concrete vs. Clay: A Close Look at Similar Roofing Types

Concrete tiles offer a versatile alternative to clay tiles, with the ability to mimic various styles. However, their significant weight means that the roof structure and installation implications must be carefully considered.

The choice between concrete and clay often involves balancing aesthetic preferences, structural considerations, and budget constraints.

Metal and Wood Alternatives: Weighing the Pros and Cons

Metal roofs and wood shakes each have unique characteristics that may appeal to different homeowners. Metal roofs are known for their longevity and energy efficiency but may be prone to cosmetic damage and noise during inclement weather.

Wood shakes offer natural aesthetics and insulation benefits but require more maintenance and have fire safety considerations.

Clay Tile Roof Summary

As we conclude this exploration of clay tile roofs, it’s clear that they offer an exceptional blend of durability, beauty, and history. While the initial investment and maintenance requirements may seem daunting, the long-term benefits of energy efficiency, increased home value, and the sheer elegance they bring to a home’s exterior cannot be overlooked. For those who choose clay tile roofing, the result is a timeless masterpiece that will protect and beautify their home for generations.

Clay Tile Roof Frequently Asked Questions

Roofing the Villages answers the most common clay tile roof questions below:

How long can I expect my clay tile roof to last?

A well-maintained clay tile roof can last over 100 years, offering long-lasting protection and aesthetic appeal for your home.

Are clay tile roofs only suitable for certain architectural styles?

No, clay tile roofs are adaptable to various architectural styles, including barrel, flat, French, and Spanish tiles. Therefore, they are not only suitable for certain architectural styles.

What are the main drawbacks of choosing a clay tile roof?

The main drawbacks of choosing a clay tile roof are the potential for cracked or damaged tiles, the need for a reinforced roof structure due to their weight, and higher upfront costs compared to other roofing materials. These factors should be carefully considered before making a decision.

Can clay tile roofs help reduce energy costs?

Yes, clay tile roofs can help reduce energy costs by limiting heat transfer and reducing cooling expenses, especially in warmer climates.

Is it difficult to find a contractor experienced in installing clay tile roofs?

Finding a contractor experienced in installing clay tile roofs can be challenging due to the specialized skills required, but comparing quotes and evaluating contractors’ experience and reputation can help in finding a qualified professional.

Roofing the Villages
(352) 293-2449

For the original version of this article visit: https://roofersthevillagesfl.com/clay-tile-roof/

Friday, April 26, 2024

Roof Inspection After Installation 101

Have you recently installed a new roof? A prompt roof inspection after installation is invaluable. It serves as a critical check to avoid future repairs, ensuring your roof is dependable from day one. It’s a practical approach to protect your home and wallet.

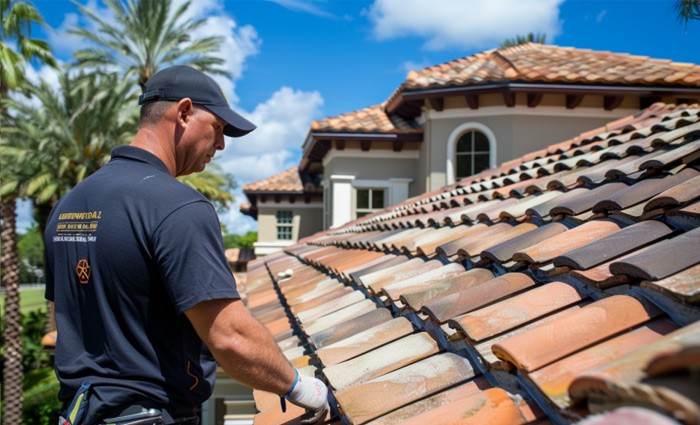
roof inspection after installation

Key Takeaways

  • A post-installation roof inspection is imperative for ensuring a new roof’s safety, integrity, and correct installation. This can prevent future structural problems and provide homeowners security and peace of mind.
  • Professional roof inspections, whether traditional or utilizing high-tech analysis such as drones and infrared, involve detailed examinations of the roofing system both externally and internally to ensure no defects or issues compromise its integrity and function.
  • If a new roof fails inspection, it’s crucial to contact the original contractor for necessary repairs under warranty, follow up with additional inspections as needed, and seek legal or consumer advocacy assistance if the contractor is uncooperative.

The Necessity of a Post-Installation Roof Check

A roof stands as the guardian of your home, shielding it from storms, heat, and cold. But what guarantees that this guardian was appointed correctly? That’s where the importance of a post-roof installation check comes to light. A thorough roof inspection by a certified professional is the seal of approval every homeowner should seek after having their roof installed. It isn’t just about ticking a box; it’s about ensuring your household’s safety and your investment’s integrity. After all, an issue as minor as missing flashing or inadequate weather resistance can have dire consequences, ranging from leaks to structural damage, which is why early detection is crucial.

Perhaps the most significant benefit of a roof inspection is reassurance. Knowing that a professional has scrutinized every shingle and seal and has affirmed that your roof is correctly installed offers an invaluable sense of security. It’s a protective measure that not only safeguards your home but also provides clarity and peace of mind. In the event of a future issue, you can rest assured that your roof was installed with precision and care.

Ensuring Proper Installation

your new roof is installed correctly

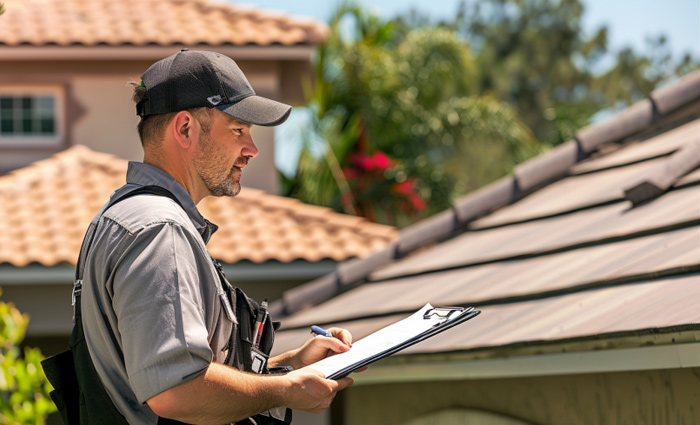
Ensuring that your new roof is installed correctly is not merely about aesthetics but performance and longevity. A certified roof inspector will examine your roofing system’s interior and exterior aspects with a fine-tooth comb. They will verify that each shingle is nailed down securely and properly aligned and that the overhang is within the optimal range to guard against water infiltration and wind damage. The inspector’s keen eye will also assess the flashing, a component crucial for channeling water away from the roof’s vulnerable areas. To fulfill its purpose, it must be intact, properly installed, and free of peeling or rust. Having your roof inspected by a certified roof inspector ensures the quality and durability of your new roof.

Moving beyond the exterior, the inspector will also venture into the attic. Here, they will look for uniformity in the roof’s appearance and scan for any signs of discoloration or rot. These could be telltale signs of moisture penetration or flaws in the roofing installation, leading to more significant problems if left unchecked. This rigorous examination process is the cornerstone of ensuring that your roof replacement process results in a durable, weather-resistant covering over your home.

Detecting Early Issues

The adage “a stitch in time saves nine” rings especially true when it comes to your roof. Detecting early issues post-installation can be the difference between simple fixes and extensive water damage repairs. A professional roof inspection can unearth the following:

  • Poor workmanship
  • Material defects
  • Placement of shingles
  • Condition of fixtures like fascia and soffits
  • Even the most minor signs that suggest subpar quality

This meticulous assessment includes all of these factors to ensure that any issues are caught early and can be addressed before they cause significant problems.

Regular maintenance check-ups are pivotal, but the inspection after installation serves a more urgent purpose: to ensure the roofing materials and workmanship are up to the mark from day one. This preemptive measure can alert you to any structural issues or leaks that, if addressed promptly, can save you from the distress and expense of damage control down the line.

Comprehensive Guide to Professional Roof Inspection Services

Diving into the realm of professional roof inspection services, one finds a landscape dotted with diverse options. These inspections differ not only in price but also in the level of technological sophistication employed. Regular maintenance check-ups by your roofing company are beneficial, but they serve different objectives than a dedicated roof inspection. The latter is a more in-depth look at the health of your roofing system. Whether you’re considering a roof inspection for annual preventative maintenance or as part of the due diligence before purchasing a new home, it’s an investment in the longevity of your property.

Timing is also essential; the ideal period for a roof inspection is typically in the fall. This is not just because of the favorable weather conditions but also as preparation for the harsher winter months ahead. As a homeowner, it’s important to understand what’s included in a roof inspection. Does it cover both the exterior and interior evaluation? Will it utilize advanced technology like drones or infrared inspections? Knowing these details ensures that you get a comprehensive service that leaves no stone—or, in this case, shingle—unturned.

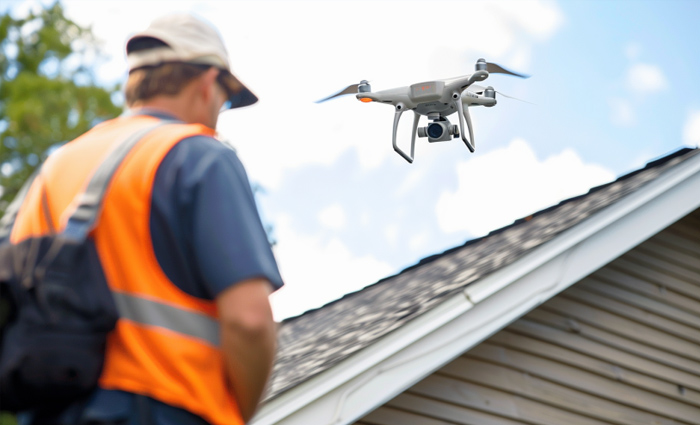
contractor using a drone to inspect a roof

In-Depth Examination with Physical Inspection

The traditional in-depth examination with a physical inspection remains a cornerstone of professional roof inspection services, including roof inspections. This hands-on approach allows the inspector to closely scrutinize every inch of your roof’s exterior and interior. It’s a meticulous process that for roofersthevillagesfl.com involves:

  • Climbing onto the roof
  • Checking for any loose materials
  • Inspecting the gutters for clogs that can lead to water damage
  • Searching for any signs that could indicate mold or other forms of damage

It’s a physically demanding task that requires a keen eye and expertise to ensure that your roof is structurally sound and equipped to protect your home from the elements.

A physical inspection is also a chance to evaluate the roof’s underlayment, its overall condition, and any potential issues that might not be immediately visible. It’s a thorough process that offers a comprehensive look at your roof’s current state, providing a vital piece in the puzzle of home maintenance.

High-Tech Analysis: Drone and Infrared Inspections

In the pursuit of precision and safety, high-tech analysis has become an integral part of the roof inspection process. Some of these high-tech analysis methods include:

  • Drone inspections, which offer a bird’s eye view of your roof, capture detailed visual information from angles that might be inaccessible or unsafe for inspectors to reach by traditional means.
  • Thermal imaging can detect areas of heat loss or moisture intrusion in your roof.
  • Moisture meters can measure the moisture content of your roof to identify potential leaks or water damage.
  • Infrared cameras can detect areas of heat or energy loss in your roof.

These innovative inspections reduce the need for inspectors to physically traverse the entirety of the fiberglass shingle roof, which can be particularly beneficial for steep or complex roofing systems.

Infrared inspections are another leap forward in roofing technology. By detecting subtle temperature variations with thermal imaging, these inspections can uncover hidden damage, such as minor leaks and fissures, long before they become visible to the naked eye. Though they may come at a higher cost, the comprehensive view of your roof’s integrity that an infrared inspection provides can be invaluable in preventing future problems.

What Does a Roof Inspector Look For?

what does a roof inspector look at

When a professional roofer arrives to inspect your roof, they come with a checklist that covers the full spectrum of potential issues. They assess the structural integrity, ensuring that the overall structure, including rafters and trusses, is sound and capable of withstanding the rigors of the environment. They examine the condition of roofing materials, such as shingles and tiles, looking for any signs of wear, damage, or improper installation that could compromise the roof’s effectiveness. The inspection process is thorough, leaving no stone unturned to ensure that your roofing system is up to code, strong enough to keep water out, and well-ventilated.

Moreover, roof inspectors are on the lookout for missing or damaged materials and mistakes that might have been made during installation. Their expert eyes are trained to spot minor discrepancies that could lead to significant issues down the road, ensuring that homeowners are not left dealing with the fallout of a poorly installed or deteriorating roof.

Interior Evaluation

The interior roof inspection is as critical as the external examination when it comes to a roof inspection. Here, the inspector turns their attention to the attic, checking for:

  • Signs of movement or moisture penetration in the structural supports
  • Structural issues like cracked rafters or a sagging ceiling could indicate serious problems with the roof’s ability to bear weight.
  • Signs of rot, especially in the roof decking, could suggest that water has found its way in

Additionally, the inspector will be on the lookout for leaks, which might be evidenced by compromised roofing felt or membrane. They also assess the level of insulation and ventilation within the attic. These are crucial for maintaining the home’s energy efficiency and preventing issues like ice dams in colder climates. It’s a detailed process that offers final thoughts on the roof’s interior quality and structural integrity.

Exterior Scrutiny

Stepping outside, the inspector’s scrutiny shifts to the roof’s exterior components. This part of the inspection is vital and requires professional expertise to perform accurately. As the inspector methodically goes over the roof’s surface, they are vigilant for any signs of:

  • rot, which can be a red flag for more extensive underlying issues
  • wear and tear, such as loose or missing shingles
  • any cracked or split roofing materials that could jeopardize the roof’s integrity

The evaluation also includes looking for any other issues that may affect the roof’s performance and durability.

This exterior roof inspection is not just about identifying current problems; it’s about forecasting potential issues that could arise. By catching these early, homeowners can avoid the escalating costs and headaches associated with significant roof damage.

Steps to Take if Your Roof Fails Inspection

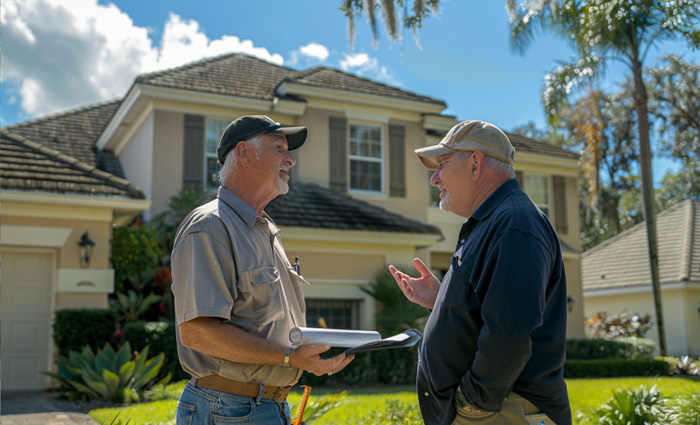
homeowner discussing roof inspection results with a professional roofer

Discovering that your brand-new roof has failed inspection can be a disheartening experience. However, there are clear steps to take to rectify the situation. Here are the steps you should follow:

  1. Contact the original roofing contractor who installed the roof.
  2. Present them with the inspection results and expect them to perform the necessary repairs or replacements, often at minimal or no extra cost, especially if they are responsible for the issues identified.
  3. Review your contractual agreement and warranty, as these documents will guide your next steps and protect your rights as a homeowner.

After completing any necessary repairs, insist on another roof inspection to ensure that all issues have been properly addressed. Should the contractor be uncooperative or dispute the need for repairs, don’t hesitate to seek legal advice or reach out to consumer protection organizations like the Better Business Bureau. It’s your right to demand quality work and to hold contractors accountable for the integrity of your roof.

Selecting the Right Roofing Contractor for Your Inspection

Selecting the right qualified roofing contractor for your inspection is a decision that should not be taken lightly. It’s imperative to look beyond glossy brochures and slick websites; instead, focus on the contractor’s track record. A contractor’s previous work and client feedback offer invaluable insights into their work ethic and quality. Local contractors also bring the advantage of familiarity with regional building codes and weather patterns, which can impact the inspection’s outcome.

When comparing contractors, it’s crucial not just to look at the price but to scrutinize the scope of services offered. Multiple estimates can help you discern the market rate and set your expectations for what a thorough inspection should encompass. Moreover, examine the estimates closely for thoroughness and transparency. Red flags to watch for include hidden fees or vague explanations of the services provided. Ensure there is clarity around what the inspection will cover and that the contractor is upfront about any additional costs that might arise.

Your home’s well-being depends on the quality of the inspection, so choose a reputable roofer who will deliver a comprehensive evaluation.

Qualifications of a Professional Roof Inspector

The qualifications of a professional roof inspector are non-negotiable. At the minimum, they should have:

  • a high school diploma
  • additional education (often favored by employers)
  • licensing or certification (required in most states)
  • experience in the roofing industry or a related educational background (such as a degree in engineering or architecture)

These qualifications ensure that inspectors have the necessary expertise to conduct a thorough inspection.

On-the-job training is also indispensable for a roof inspector. This training helps them stay abreast of current regulations, inspection methods, and the specifics of local building codes. When selecting an inspector, ask about their qualifications, experience level, and whether they receive ongoing training to keep up with industry standards.

Comparing Roof Inspection Costs

Understanding the cost implications of a professional roof inspection is essential for homeowners. The price of an inspection can vary significantly depending on the type of inspection conducted, with physical inspections generally falling between $200 and $400. Drone inspections offer a different price range and level of detail, with costs also influenced by the complexity of the roof’s design. Given their advanced technology and comprehensive results, infrared inspections tend to be on the higher end of the cost spectrum, often starting at $400.

homeowner evaluating inspection costs

However, it’s important to remember that the cost of an inspection is also influenced by the roof’s size, accessibility, and the inspector’s expertise and certification. When evaluating costs, homeowners should weigh the long-term benefits of a quality inspection against the initial expense. While it may be tempting to opt for the cheapest option, investing in a thorough inspection by a certified and experienced professional can save you from future costs and ensure the longevity of your brand-new roof.

Roof Inspection Summary

As we wrap up this comprehensive guide, it’s clear that the importance of a roof inspection post-installation cannot be overstated. Ensuring that your new roof is faultlessly installed and accessible from early issues not only protects your home from potential damage but also solidifies your investment. Professional roof inspections, be they physical, drone-assisted, or infrared, are indispensable tools in a homeowner’s arsenal, offering an in-depth look at the condition of a brand-new roof and peace of mind that it has been installed with expertise and care.

In closing, remember that the quality of your roof inspection is largely dependent on the qualifications and diligence of the roofing contractor you choose. Comparing costs, qualifications, and reviews will help you find a reputable roofer who can provide a thorough and honest evaluation. Although these steps may require time and effort, they will ensure the longevity and integrity of your roof, saving you from potential headaches and financial strain in the future.

Frequently Asked Questions

How often should I get my roof inspected?

It is recommended to have your roof inspected annually for preventative maintenance, especially in the fall, before the winter months, or before purchasing a new home to ensure everything is in top condition. Therefore, scheduling an annual inspection is advisable for maintaining the condition of your roof.

What’s the difference between a roof inspection and a maintenance check-up?

A roof inspection is a comprehensive evaluation conducted by a certified professional to identify potential issues, while a maintenance check-up is a routine assessment focusing on basic upkeep. Both are important for the overall health of your roof.

Can drone and infrared inspections replace the need for a physical roof inspection?

While drone and infrared inspections offer unique advantages, they are generally used to complement rather than replace a physical roof inspection. Combining methods ensures the most thorough evaluation of your roof’s condition.

What should I do if my roof fails an inspection after installation?

Contact the original roofing contractor for repairs or replacements as per your contractual agreement and warranty. Seek legal advice if necessary to ensure the issues are adequately addressed.

What qualifications should I look for in a professional roof inspector?

Look for a roof inspector with the proper licensing or certification, additional education in related fields, prior roofing experience, and ongoing training to ensure a thorough and expert inspection. These qualifications vary by state and should be carefully considered.

Roofing the Villages
(352) 293-2449

For the original version of this article visit: https://roofersthevillagesfl.com/roof-inspection-after-installation-101/

Roof Types for Insurance

Your roof does more than keep the rain out. For insurance companies, it’s one of the first things they evaluate when deciding how much to ch...